Particles and Sound
How to implement a space shooter with SpriteKit and SWIFT - Part 5
Adding particles and sound:

Lite Version
Full Version
Tutorial Overview: How to implement a space shooter with SpriteKit and SWIFT
- Part 1: Initial project setup, sprite creation and movement using SKAction and SKConstraint
- Part 2: Adding enemies, bullets and shooting with SKAction and SKConstraint
- Part 3: Adding a HUD with SKLabelNode and SKSpriteNode
- Part 4: Adding basic game logic and collision detection
- Part 5: Adding particles and sound
- Part 6: GameCenter integration
- Part 7: iAd integration
- Part 8: In-App Purchases
Welcome to part 5 of my tutorial series. In the previous parts we’ve created a sprite, added movement, created enemies which follow our sprite, added bullets, a HUD, collision detection, …. But, for a real game some important elements are missing to beautify the game:
- Sound effects: explosions, game over, …
- Particle effects: explosions, background star field
I’ll show how to implement this today. As a starting point you can download the code from tutorial part 4 here.
1. Adding sound effects
First me need some sound effects in WAV format, which is supported out of the box by iOS. There are several ways to get them. For example:
- GarageBand: An excellent tutorial is available on raywenderlich.com.
- CFXR: A very simple tool to create 8Bit sound effects
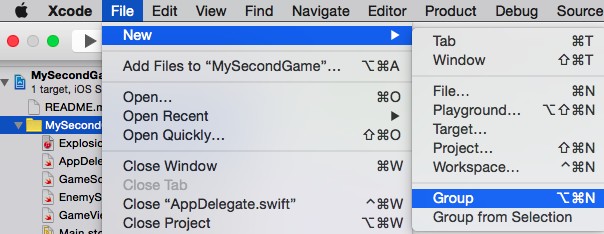
To keep your project structure clean, create a new group and name it resources:
Once you have a wav file add it to your project:

To play the sound add this line of code to your lifeLost method:
runAction(SKAction.playSoundFileNamed(“Explosion.wav”, waitForCompletion: false))
That’s all!
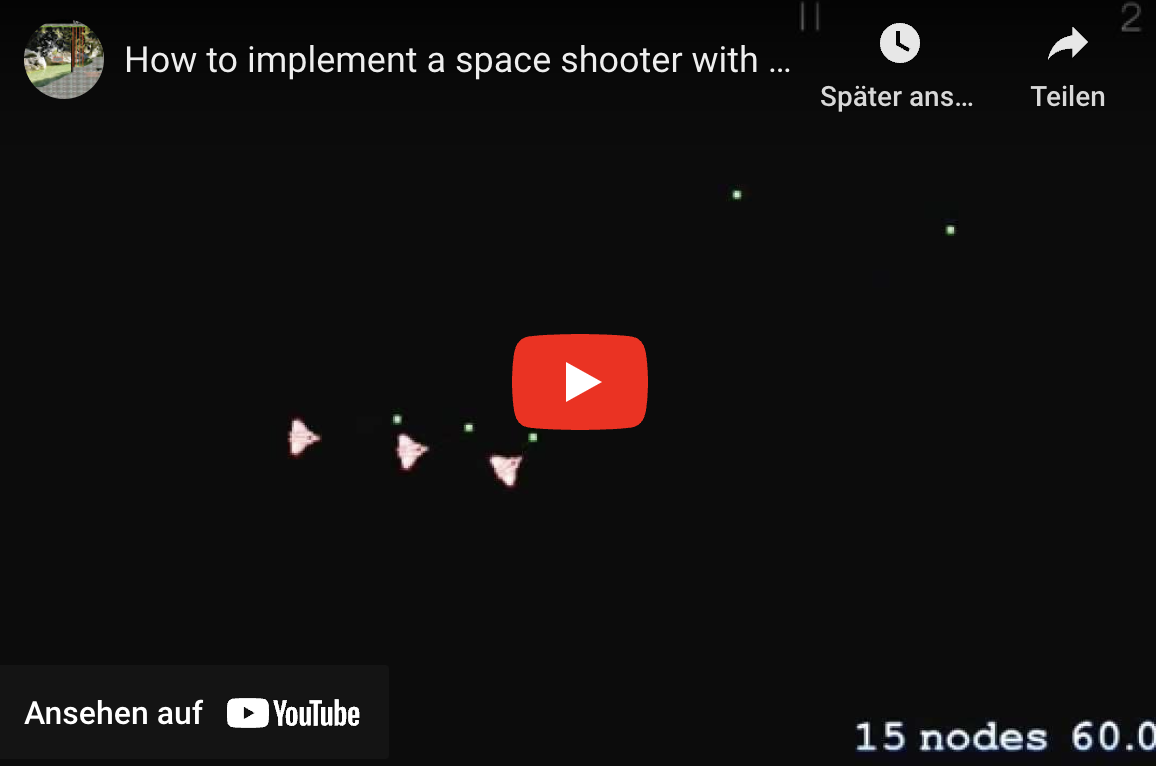
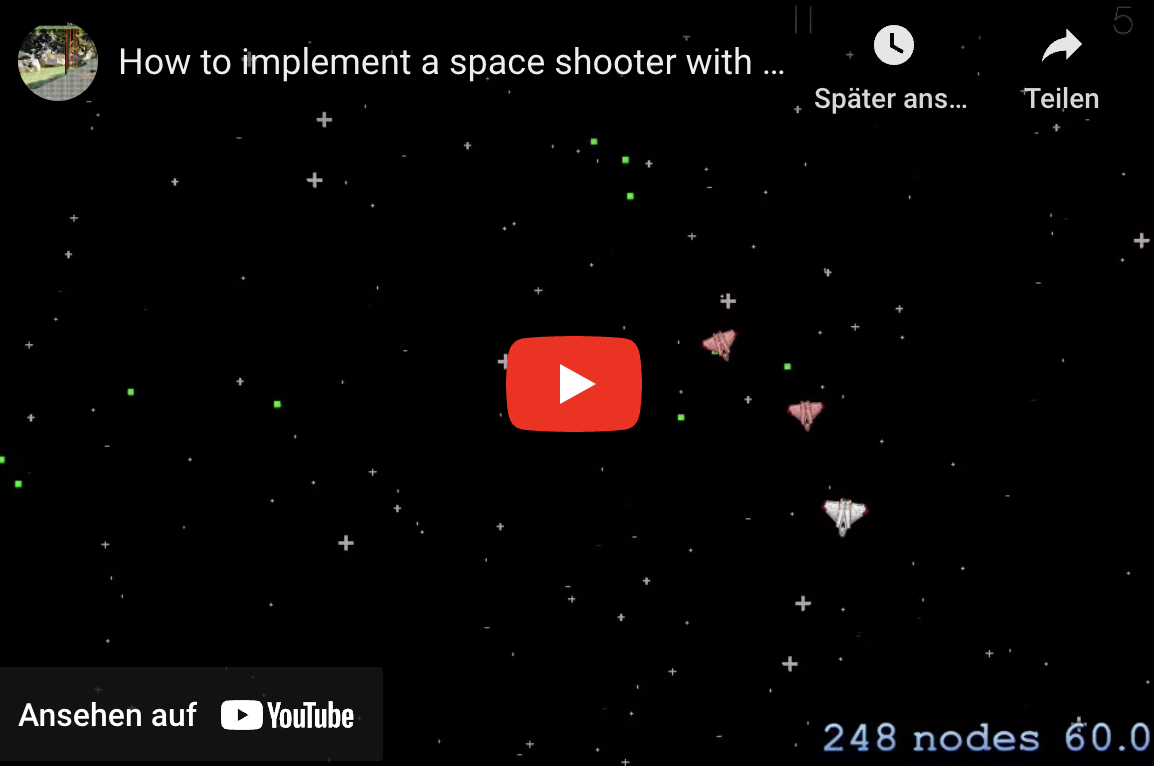
2. Adding particle effects
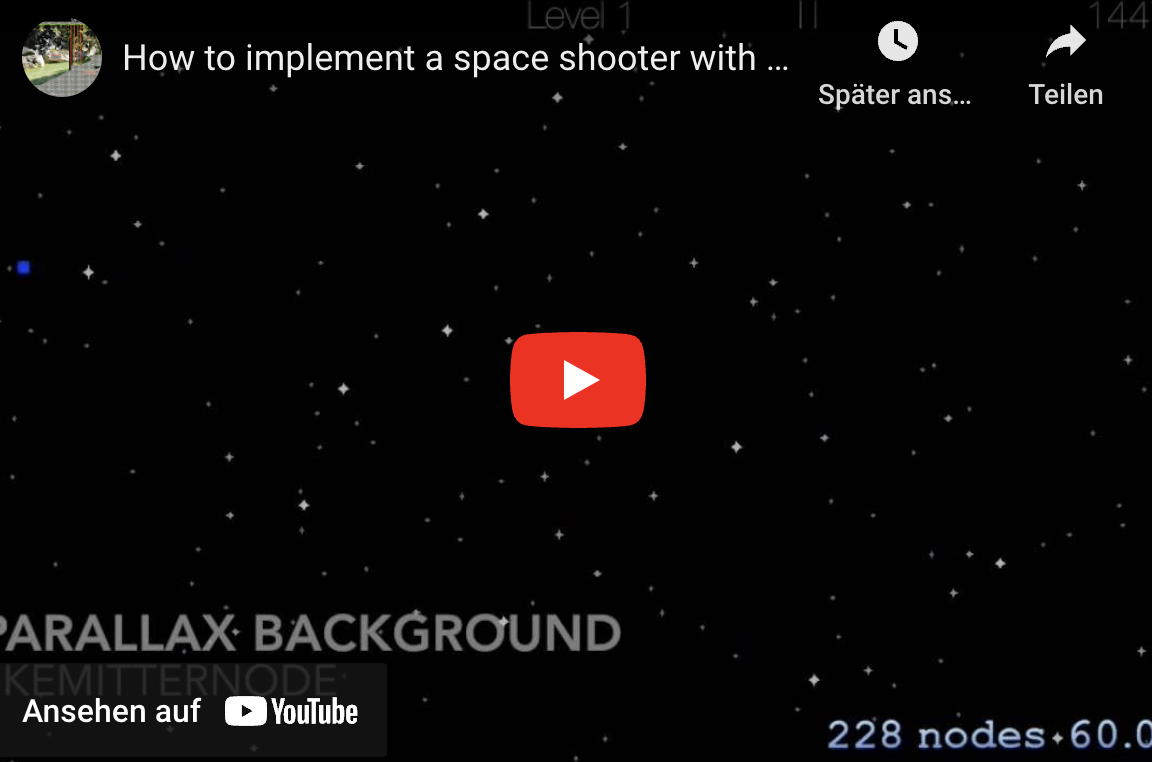
The video at the top shows two different kind of particle effects. One for explosions and one for the background star field. I’ll use the built in particle editor from XCode to create these effects.
2.1 Add Explosions
Add a new SpriteKit Particle File to your project:
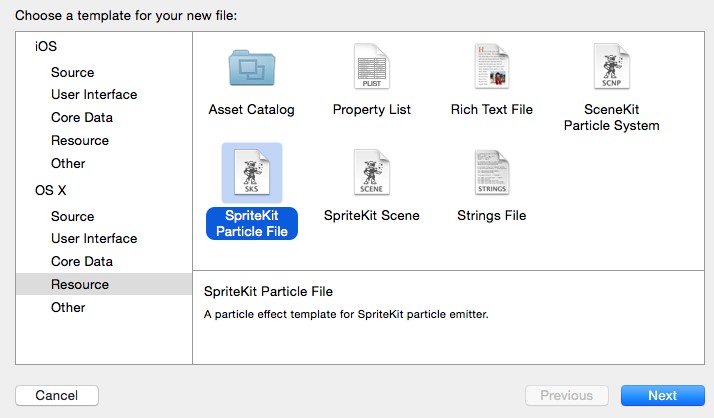
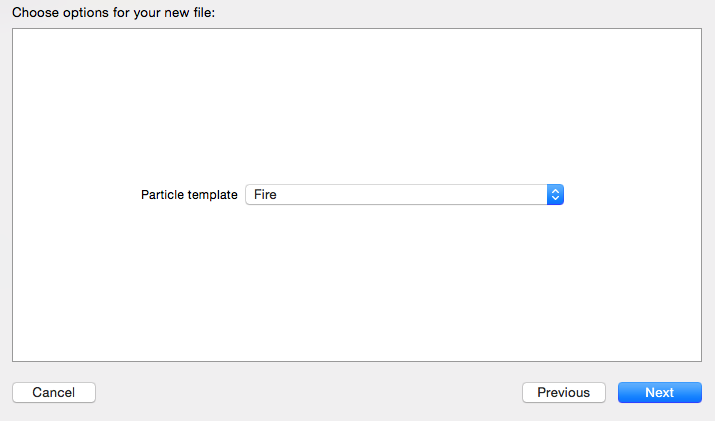
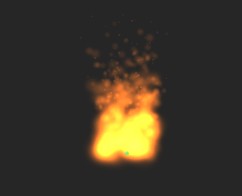
Choose template type fire and name it ExplosionParticle

The result will look like this:
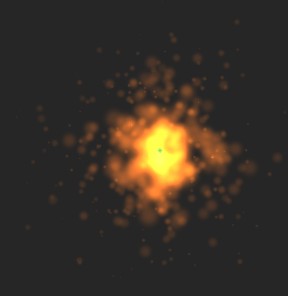
Change Position Range to 50 for X and Y to get an particle object with same height and width. Currently the particles are moving upwards. A circle movement from one center into all directions looks more like an explosion. To achieve this set the Start Angle to 0 and change the Range to 360 degrees. You can also play with the Speed values to adjust the explosion effect.
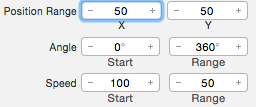
The timeframe for the explosion depends on Birthrate and Maximum. A smaller maximum together with a high birthrate leads to a short explosion effect. The size can be changed with the Lifetime values. A longer particle lifetime will result in a bigger explosion.
Now, add a new method explosion to GameScene.swift:
func explosion(pos: CGPoint) { var emitterNode = SKEmitterNode(fileNamed: "ExplosionParticle.sks") emitterNode.particlePosition = pos self.addChild(emitterNode) // Don't forget to remove the emitter node after the explosion
  self.runAction(SKAction.waitForDuration(2), completion: { emitterNode.removeFromParent() })
}
Call the new method from lifeLost:
func lifeLost() {
  explosion(self.heroSprite.position)
  ...
2.2 Add a startfield:
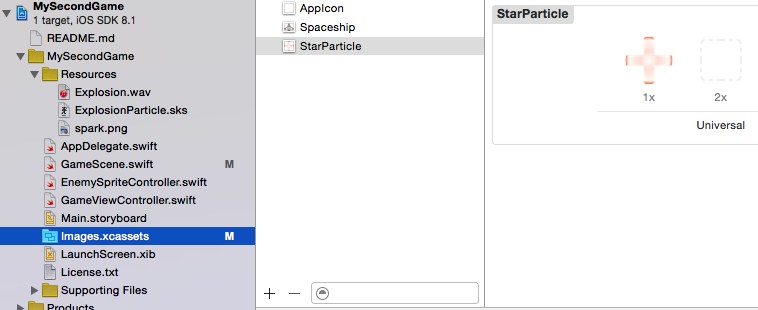
To create a starfield with a parallax effect I’ll combine multiple emitter nodes. The node on top will show big, light stars which moves fast. The stars for the middle layer are medium sized and darker with a slower movement. The background layer has the darkest, smallest and slowest stars. To avoid the effort to create 3 different sks files I’ll create the particles with code. Add an image with a star to the asset catalog:

Add a new method starfieldEmitter to GameScene.swift:
func starfieldEmitter(color: SKColor, starSpeedY: CGFloat, starsPerSecond: CGFloat, starScaleFactor: CGFloat) -> SKEmitterNode {
  // Determine the time a star is visible on screen
  let lifetime = frame.size.height * UIScreen.mainScreen().scale / starSpeedY

  // Create the emitter node
  let emitterNode = SKEmitterNode()
  emitterNode.particleTexture = SKTexture(imageNamed: "StarParticle")
  emitterNode.particleBirthRate = starsPerSecond
  emitterNode.particleColor = SKColor.lightGrayColor()
  emitterNode.particleSpeed = starSpeedY * -1
  emitterNode.particleScale = starScaleFactor
  emitterNode.particleColorBlendFactor = 1
  emitterNode.particleLifetime = lifetime

  // Position in the middle at top of the screen
  emitterNode.position = CGPoint(x: frame.size.width/2, y: frame.size.height)
  emitterNode.particlePositionRange = CGVector(dx: frame.size.width, dy: 0)

  // Fast forward the effect to start with a filled screen
  emitterNode.advanceSimulationTime(NSTimeInterval(lifetime))
  return emitterNode
}
Create three emitter nodes for the starfield at the end of didMoveToView:
// Add Starfield with 3 emitterNodes for a parallax effect
// - Stars in top layer: light, fast, big
// - ...
// - Stars in back layer: dark, slow, small

var emitterNode = starfieldEmitter(SKColor.lightGrayColor(), starSpeedY: 50, starsPerSecond: 1, starScaleFactor: 0.2)
emitterNode.zPosition = -10
self.addChild(emitterNode)
emitterNode = starfieldEmitter(SKColor.grayColor(), starSpeedY: 30, starsPerSecond: 2, starScaleFactor: 0.1)
emitterNode.zPosition = -11
self.addChild(emitterNode)
emitterNode = starfieldEmitter(SKColor.darkGrayColor(), starSpeedY: 15, starsPerSecond: 4, starScaleFactor: 0.05)
emitterNode.zPosition = -12
self.addChild(emitterNode)
That’s all for today. In my next part I’ll show how to integrate game center. You can download the code from GitHub: Part 5 or the latest version here.
You can also download my prototyping App for this tutorial series:
Lite Version
Full Version
Cheers,
Stefan