Quick Tip: Endless scrolling with SpriteKit and SWIFT (Part 1 of 2)
Endless scrolling with background tiles
Welcome to my tutorial series about scrolling:
This video gives an impression what I’ll show today:

1. About the algorithm and the background tiles
Creating the image tiles for the scrolling parts of the background:
First we need a background image:

Let’s mirror this image and add the new one at the right side:

Copy the original image and append it at the right side. In our app we will have three sprite nodes, one for each image tile:

Scrolling will start at the left side:

Let’s add a static background image:

To scroll right, move the background tiles in the left direction:

If the end at the right side is reached:

Move the background tiles back to the start position:

The SpriteKits object hierarchy will be created this way:
- scene (SKScene)
- backgroundNode (SKSpriteNode)
- worldNode (SKNode)
- leftTileNode (SKSpriteNode)
- middleTileNode (SKSpriteNode)
- rightTileNode (SKSpriteNode)
- spriteNode (SKSpriteNode)
The worldNode will be moved to implement the scrolling.
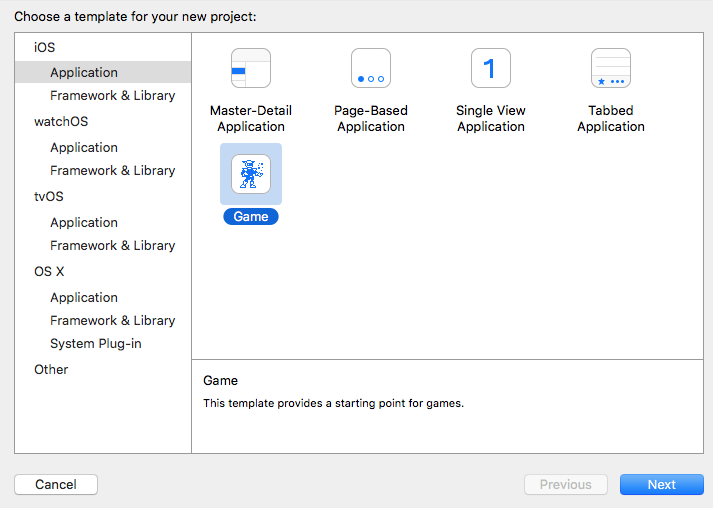
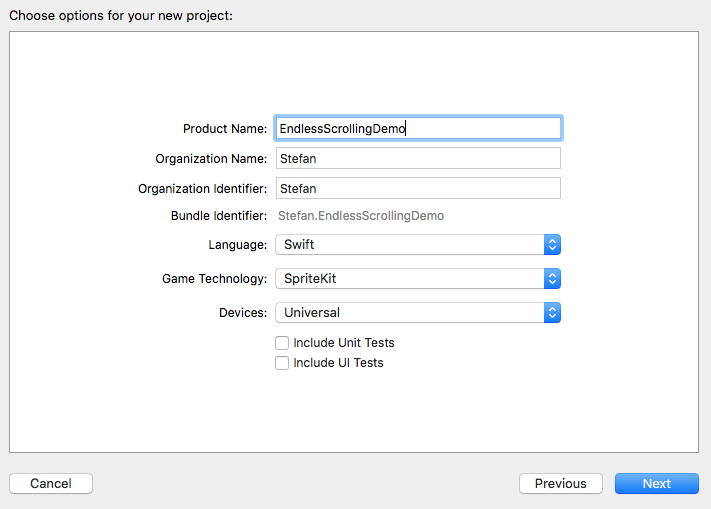
2. Create the SWIFT project:
Create a new Sprite Kit project:
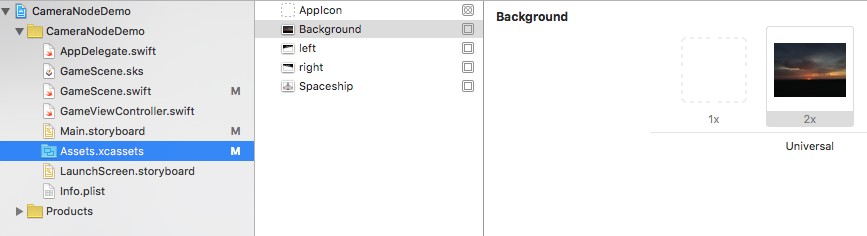
Open Asset Catalogue and add three images (Background, LeftTile, rightTile)
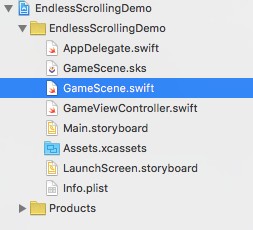
Open GameScene.swift:
Replace the complete code with this snippet:
(For explanation check the comments inside the code snippet)
//
// GameScene.swift
// EndlessScrollingDemo
//
// Created by STEFAN on 13/11/15.
// Copyright (c) 2015 Stefan. All rights reserved.
//

import SpriteKit

class GameScene: SKScene {
  // Declare the globaly needed sprite kit nodes
  var worldNode: SKNode?
  var spriteNode: SKSpriteNode?

  // store the width of the NodeTiles
  var nodeTileWidth: CGFloat = 0.0

  // store the start position of the movement
  var xOrgPosition: CGFloat = 0

  override func didMoveToView(view: SKView) {
    // Setup static background
    let backgroundNode = SKSpriteNode(imageNamed: "Background")
    backgroundNode.size = CGSize(width: self.frame.width, height: self.frame.height)
    backgroundNode.anchorPoint = CGPoint(x: 0, y: 0)
    backgroundNode.zPosition = -10
    self.addChild(backgroundNode)

    // Setup world
    worldNode = SKNode()
    self.addChild(worldNode!)

    // Setup dynamic background tiles
    // Image of left and right node must be identical
    let leftNode = SKSpriteNode(imageNamed: "LeftTile")
    let middleNode = SKSpriteNode(imageNamed: "RightTile")
    let rightNode = SKSpriteNode(imageNamed: "LeftTile")
    nodeTileWidth = leftNode.frame.size.width
    leftNode.anchorPoint = CGPoint(x: 0, y: 0)
    leftNode.position = CGPoint(x: 0, y: 0)
    middleNode.anchorPoint = CGPoint(x: 0, y: 0)
    middleNode.position = CGPoint(x: nodeTileWidth, y: 0)
    rightNode.anchorPoint = CGPoint(x: 0, y: 0)
    rightNode.position = CGPoint(x: nodeTileWidth * 2, y: 0)

    // Add tiles to worldNode. worldNode is used to realize the scrolling
    worldNode!.addChild(leftNode)
    worldNode!.addChild(rightNode)
    worldNode!.addChild(middleNode)

    // Setup sprite
    spriteNode = SKSpriteNode(imageNamed: "Spaceship")
    spriteNode?.position = CGPoint(x:CGRectGetMidX(self.frame), y:CGRectGetMidY(self.frame))
    spriteNode?.xScale = 0.1
    spriteNode?.yScale = 0.1
    spriteNode?.zPosition = 10
    self.addChild(spriteNode!)
  }

  // Implement the scrolling, triggered by swipe gestures
  override func touchesMoved(touches: Set<UITouch>, withEvent event: UIEvent?) {
    for touch in touches {
      // Touch position
      let xTouchPosition = touch.locationInNode(self).x
      if xOrgPosition != 0.0 {
        // calculate the new position
        let xNewPosition = worldNode!.position.x \+ (xOrgPosition \- xTouchPosition)

        // Check if right end is reached
        if xNewPosition <= -(2 * nodeTileWidth) {
          worldNode!.position = CGPoint(x: 0, y: 0)
          print("Right end reached")

          // Check if left end is reached
        } else if xNewPosition >= 0 {
          worldNode!.position = CGPoint(x: -(2 * nodeTileWidth), y: 0)
          print("Left end reached")
        } else {
          worldNode!.position = CGPoint(x: xNewPosition, y: 0)
        }

        // Rotate sprite depending on direction
        if xTouchPosition < xOrgPosition {
          spriteNode?.zRotation = CGFloat(M_PI/2.0)
        } else {
          spriteNode?.zRotation = -CGFloat(M_PI/2.0)
        }
      }
      // Store the current touch position to calculate the delta in the next iteration
      xOrgPosition = xTouchPosition
    }
  }

  override func touchesEnded(touches: Set<UITouch>, withEvent event: UIEvent?) {
    // Reset value for the next swipe gesture
    xOrgPosition = 0
  }

  override func update(currentTime: CFTimeInterval) {
    /* Called before each frame is rendered */
  }
}
You can download the complete sample from my Github repository.
I’ll show an improved version with a smoother scrolling in part 2. You can support me by downloading my Apps from the Apple AppStore:

That’s all for today.
Cheers,
Stefan