How to combine / convert ObjectiveC into SWIFT
Welcome to Part 12 of my blog series about game development: convert ObjectiveC into SWIFT
Today I’ll show how to combine SWIFT with Objective-C code. There is no need to migrate all of your existing code to SWIFT. You’ll not sell one App more, if this is the only improvement of your new version. Not to mention all the possible new bugs you might include during the migration. A better strategy could be developing new code in SWIFT and keep existing code in Objective-C. This tutorial has been upgraded to XCode 6.3 and SWIFT 1.2
I’ll show two scenarios:
- calling SWIFT from Objective-C
- calling Objective-C from SWIFT
Calling SWIFT from Objective-C:
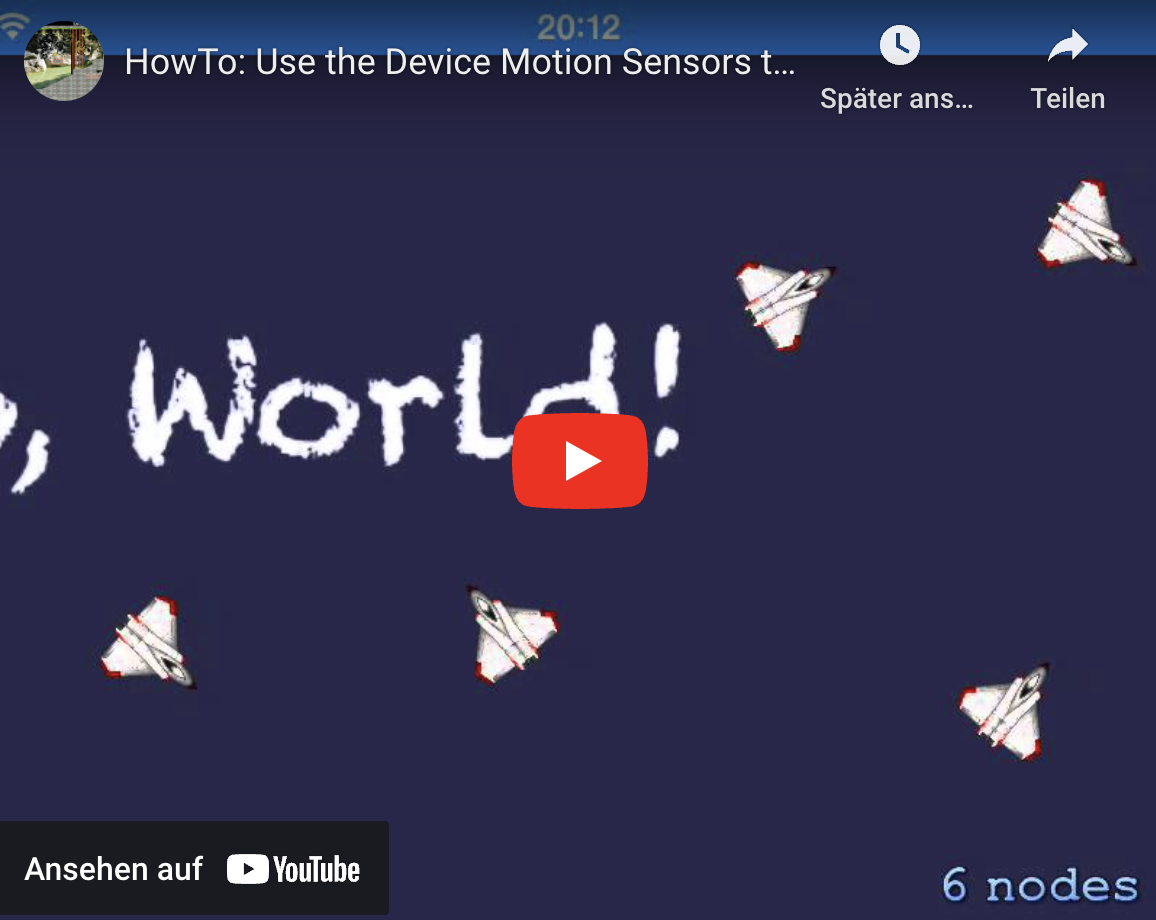
I’ll reuse my example from part 6 of my blog series: HowTo: Use the Device Motion Sensors to control your game. You can find the complete start project in my GitHub repository here. As a prerequisite you’ll need Xcode 6 beta 5 which is available for all registered apple developers.
I’ll migrate the MotionManager class to SWIFT.
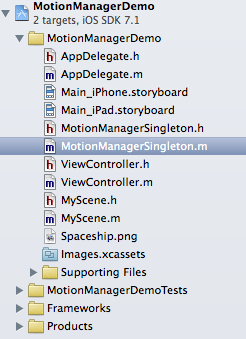
Open MotionManagerDemo project in XCode 6, add a new file of Type SWIFT and name it MotionManagerSingletonSwift:
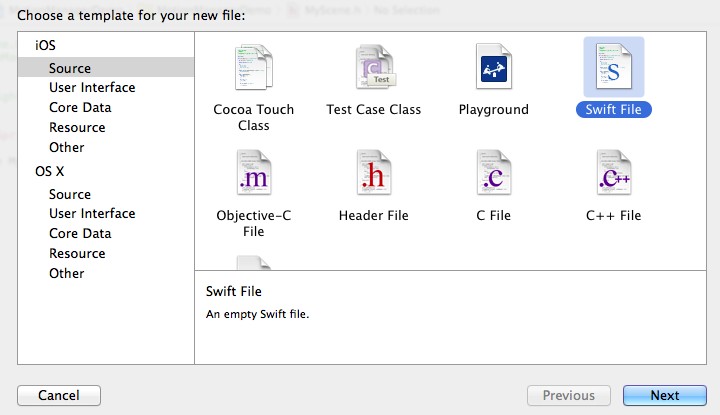
Answer yes when XCode prompts a message, if it should configure an Objective-C bridging header.
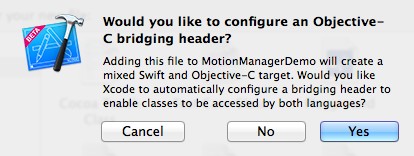
The result should look like this:
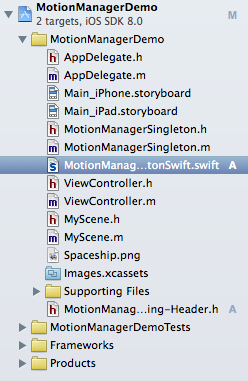
Now copy the complete content from MotionManagerSingleton.m to MotionManagerSingletonSwift.swift. As a result XCode shows something around 38 errors.
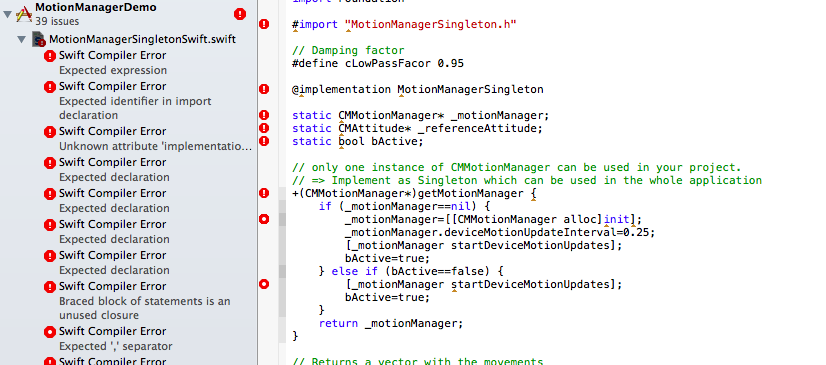
Now let’s start with the code conversion of the MotionManagerSingleton class:
1. Header files are no longer needed in SWIFT. So remove the import statement to the header file:
#import "MotionManagerSingleton.h"
and add an import to the CoreMotion Framework:
import CoreMotion
2. The keyword for constants is let. Change
#define cLowPassFactor 0.95
to
let cLowPassFactor: Float = 0.95
3. Migrate the class declaration from
@implementation MotionManagerSingleton
  ...
@end
to
class MotionManagerSingletonSwift: NSObject {
  ...
}
4. The properties can be converted into SWIFT this way:
ObjectiveC:
static CMMotionManager* _motionManager;
static CMAttitude* _referenceAttitude;
static bool bActive; ... static GLKVector3 lastVector;
Swift:
var motionManager: CMMotionManager
var referenceAttitude:CMAttitude?=nil
var bActive = false var lastVector:[Float] = [0.0, 0.0, 0.0]
I do not need the static keyword, because I’ll implement the singleton slightly different. The ‚?‘ indicates that the property referenceAttitude is optional. Appcoda has an excellent article about optionals here. GLKVector3 is currently not supported in SWIFT. Therefore I’ll use an array.
5. Each class in SWIFT needs an init method. Create one:
override init() {
  motionManager=CMMotionManager()
  motionManager.deviceMotionUpdateInterval = 0.25
  motionManager.startDeviceMotionUpdates()
  bActive=true;
}
6. Now let’s convert the singleton.
The static keyword can only be used inside a struct with the current SWIFT version. I’ll use this code snippet to migrate the getMotionManager method. Thanks to all contributors on this stackoverflow discussion for pointing me in the right direction. The class keyword is needed to specify the method getMotionManager as a Type Method and sharedInstance as a Type Property.
// only one instance of CMMotionManager can be used in your project.
// => Implement as Singleton which can be used in the whole application
class var sharedInstance: MotionManagerSingletonSwift {
  struct Singleton {
    static let instance = MotionManagerSingletonSwift()
  }
  return Singleton.instance
}

class func getMotionManager()->CMMotionManager {
  if (sharedInstance.bActive==false) {
    sharedInstance.motionManager.startDeviceMotionUpdates()
    sharedInstance.bActive=true;
  }
  return sharedInstance.motionManager
}
7. Same for getMotionVectorWithLowPass.
The biggest change is the optional handling for CMAttitude. This is needed because deviceMotion and attitude will be nil in the simulator:
var attitude: CMAttitude? = getMotionManager().deviceMotion?.attitude?;
Other changes are using an Array instead of the GLKVector3 and dispatch_after instead of performSelector to add a short time delay, till the MotionManager has completed his initialization.
ObjectiveC:
// Returns a vector with the movements
// At the first time a reference orientation is saved to ensure the motion detection works
// for multiple device positions
+(GLKVector3)getMotionVectorWithLowPass {
  // Motion
  CMAttitude *attitude = self.getMotionManager.deviceMotion.attitude;
  if (_referenceAttitude==nil) {
    // Cache Start Orientation to calibrate the device. Wait for a short time to give MotionManager enough time to initialize
    [self performSelector:@selector(calibrate) withObject:nil afterDelay:0.25];
  } else {
    // Use start orientation to calibrate
    [attitude multiplyByInverseOfAttitude:_referenceAttitude];
  }
  return [self lowPassWithVector: GLKVector3Make(attitude.yaw,attitude.roll,attitude.pitch)];
}
Swift:
// Returns an array with the movements
// At the first time a reference orientation is saved to ensure the motion detection works
// for multiple device positions
class func getMotionVectorWithLowPass() -> [Float] {
  // Motion
  var attitude: CMAttitude? = getMotionManager().deviceMotion?.attitude?;
  if sharedInstance.referenceAttitude==nil {
    // Cache Start Orientation to calibrate the device. Wait for a short time to give MotionManager enough time to initialize
    dispatch_after(250, dispatch_get_main_queue(), {
      MotionManagerSingletonSwift.calibrate()
    })
  } else if attitude != nil {
    // Use start orientation to calibrate
    attitude!.multiplyByInverseOfAttitude(sharedInstance.referenceAttitude)
  }
  if attitude != nil {
    return lowPassWithVector([Float(attitude!.yaw), Float(attitude!.roll), Float(attitude!.pitch)])
  } else {
    return [0.0, 0.0, 0.0]
  }
}
8. The migration of the remaining methods should be straight forward. I’ll just show the result:
ObjectiveC:
// Stop collecting motion data to save energy
+(void)stop {
  if (_motionManager!=nil) {
    [_motionManager stopDeviceMotionUpdates];
    _referenceAttitude=nil;
    bActive=false;
  }
}
Swift:
// Stop collection motion data to save energy
class func stop() {
  sharedInstance.motionManager.stopDeviceMotionUpdates()
  sharedInstance.referenceAttitude=nil
  sharedInstance.bActive=false
}
ObjectiveC:
+(void)calibrate {
  _referenceAttitude = [self.getMotionManager.deviceMotion.attitude copy];
}
Swift:
// Calibrate motion manager with a ne reference attitude
class func calibrate() {
  sharedInstance.referenceAttitude = getMotionManager().deviceMotion?.attitude?.copy() as? CMAttitude

  }
ObjectiveC:
// Damp the jitter caused by hand movement
+(GLKVector3)lowPassWithVector:(GLKVector3)vector {
  static GLKVector3 lastVector;
  vector.x = vector.x * cLowPassFacor \+ lastVector.x * (1.0 - cLowPassFacor);
  vector.y = vector.y * cLowPassFacor \+ lastVector.y * (1.0 - cLowPassFacor);
  vector.z = vector.z * cLowPassFacor \+ lastVector.z * (1.0 - cLowPassFacor);
  lastVector = vector;
  return vector;
}
Swift:
// Damp the jitter caused by hand movement
class func lowPassWithVector(var vector:[Float]) -> [Float] {
  vector[0] = vector[0] * cLowPassFactor \+ sharedInstance.lastVector[0] * (1.0 - cLowPassFactor)
  vector[1] = vector[1] * cLowPassFactor \+ sharedInstance.lastVector[1] * (1.0 - cLowPassFactor)
  vector[2] = vector[2] * cLowPassFactor \+ sharedInstance.lastVector[2] * (1.0 - cLowPassFactor)
  sharedInstance.lastVector = vector
  return sharedInstance.lastVector
}
Now we need to change the MyScene class to call the new SWIFT class from Objective-C:
1. Import the SWIFT class into your Objective-C class:
#import <MotionManagerDemo-Swift.h>
This article from Stackoverflow gives a nice overview about the details. The short version is that XCode creates the generic header file for all your SWIFT classes for you: MotionManagerDemo-Swift.h. This is done automatically, if your SWIFT class is derived from an Objective-C class. Otherwise mark your classes and methods with the @objc attribute to give XCode a hint. It’s obvious that only public methods can be called from Objective-C (new in XCode 6 Beta 4).
2. Change the update method in MyScene to use the new SWIFT class: ObjectiveC: GLKVector3 motionVector = [MotionManagerSingleton getMotionVectorWithLowPass];
ObjectiveC
SKSpriteNode *sprite;
for (int i=0; i<self.children.count;i++) {
  sprite=[self.children objectAtIndex:i];
  sprite.position = CGPointMake(sprite.position.x \+ _dt * motionVector.x*100, sprite.position.y);
}
SWIFT:
NSArray *motionArray = [MotionManagerSingletonSwift getMotionVectorWithLowPass];
  SKSpriteNode *sprite;
  for (int i=0; i<self.children.count;i++) {
    sprite=[self.children objectAtIndex:i];
    sprite.position = CGPointMake(sprite.position.x \+ _dt * ((NSNumber *)[motionArray objectAtIndex:0]).floatValue * 100, sprite.position.y);
}
Calling Objective-C from SWIFT:
This is much easier and I’ve not prepared a sample for that. Remember, when I’ve added the first SWIFT file, XCode promoted this message:

To access a custom Objective-C class from SWIFT, just add an import statement in the bridging header file like: #import YourCustomClass.h
That’s all for today. You can download the complete code of the demo project from GitHub. An updated version of my MyGame project can be downloaded here.
Cheers,
Stefan
