Tutorial - Create / Organize Monsters
Monsters are essential for creating challenging and engaging dungeon experiences. They add combat complexity, guard treasures, and create obstacles for players to overcome. The Monster management screen allows you to view, create, and customize monsters for your level pack.
Built-in vs Custom Monsters
You have two options when working with monsters:
Built-in Monsters
- Pre-configured: Ready to use with balanced stats
- Cannot be modified: Their properties are locked
- Quick to deploy: Perfect for rapid level design
- Tap to view: You can view their details in read-only mode
Custom Monsters
- Fully customizable: Control every aspect of the monster
- Unique designs: Create monsters that fit your level pack’s theme
- Can be modified: Adjust stats, appearance, and behavior anytime
- Can be deleted: Remove custom monsters you no longer need
Monster Overview List
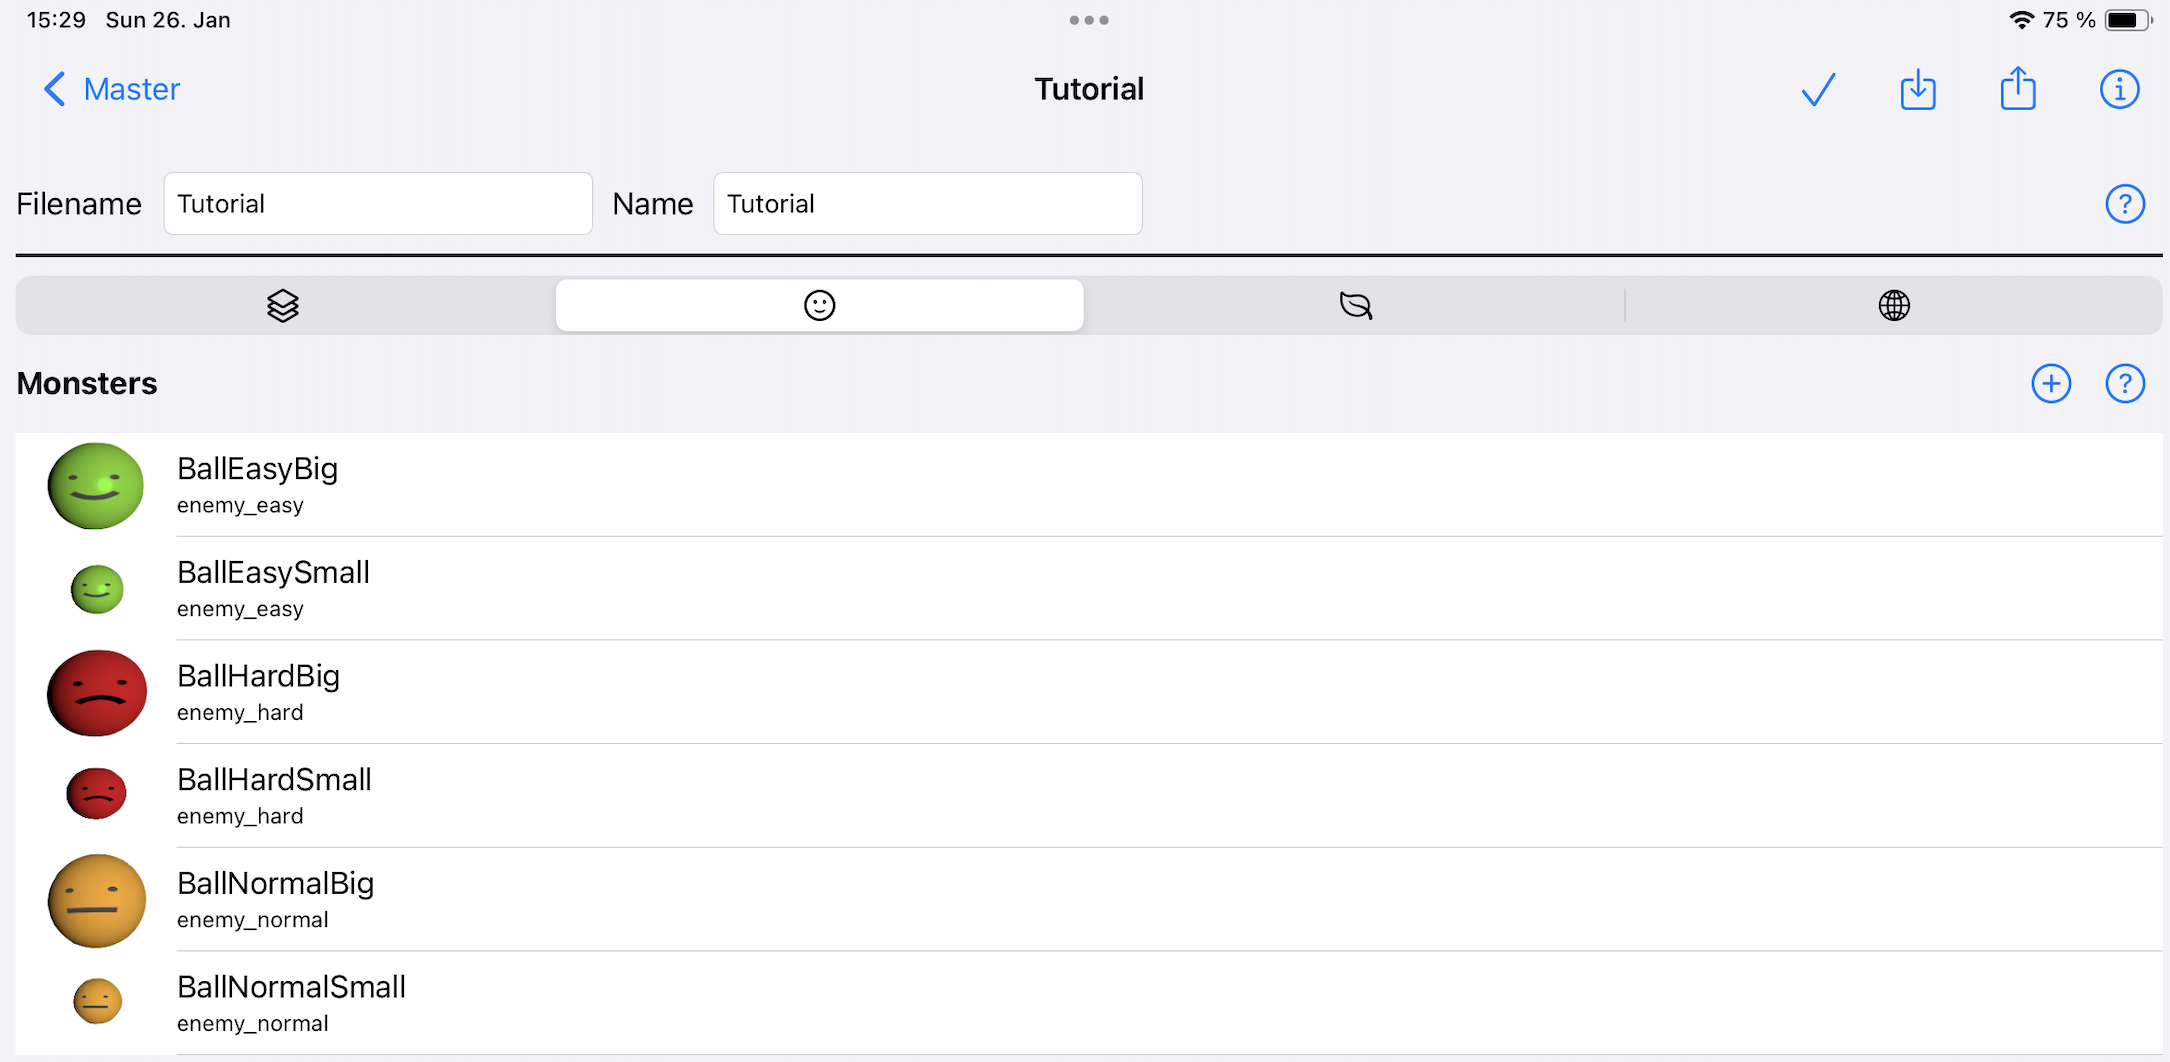
The overview screen displays all available monsters for your level pack. You can see:
- Monster name
- 3D model preview
- Size indicator (small or large)
- Whether it’s a built-in or custom monster
Create a New Monster
To create a custom monster:
- Click the + button at the top of the monster list
- The monster detail screen will open
- Configure all monster properties (described below)
- Save your new monster
To delete a custom monster, swipe left on a monster row and tap delete. Note: Only custom monsters can be deleted; built-in monsters are permanent.
Configure Monster Properties
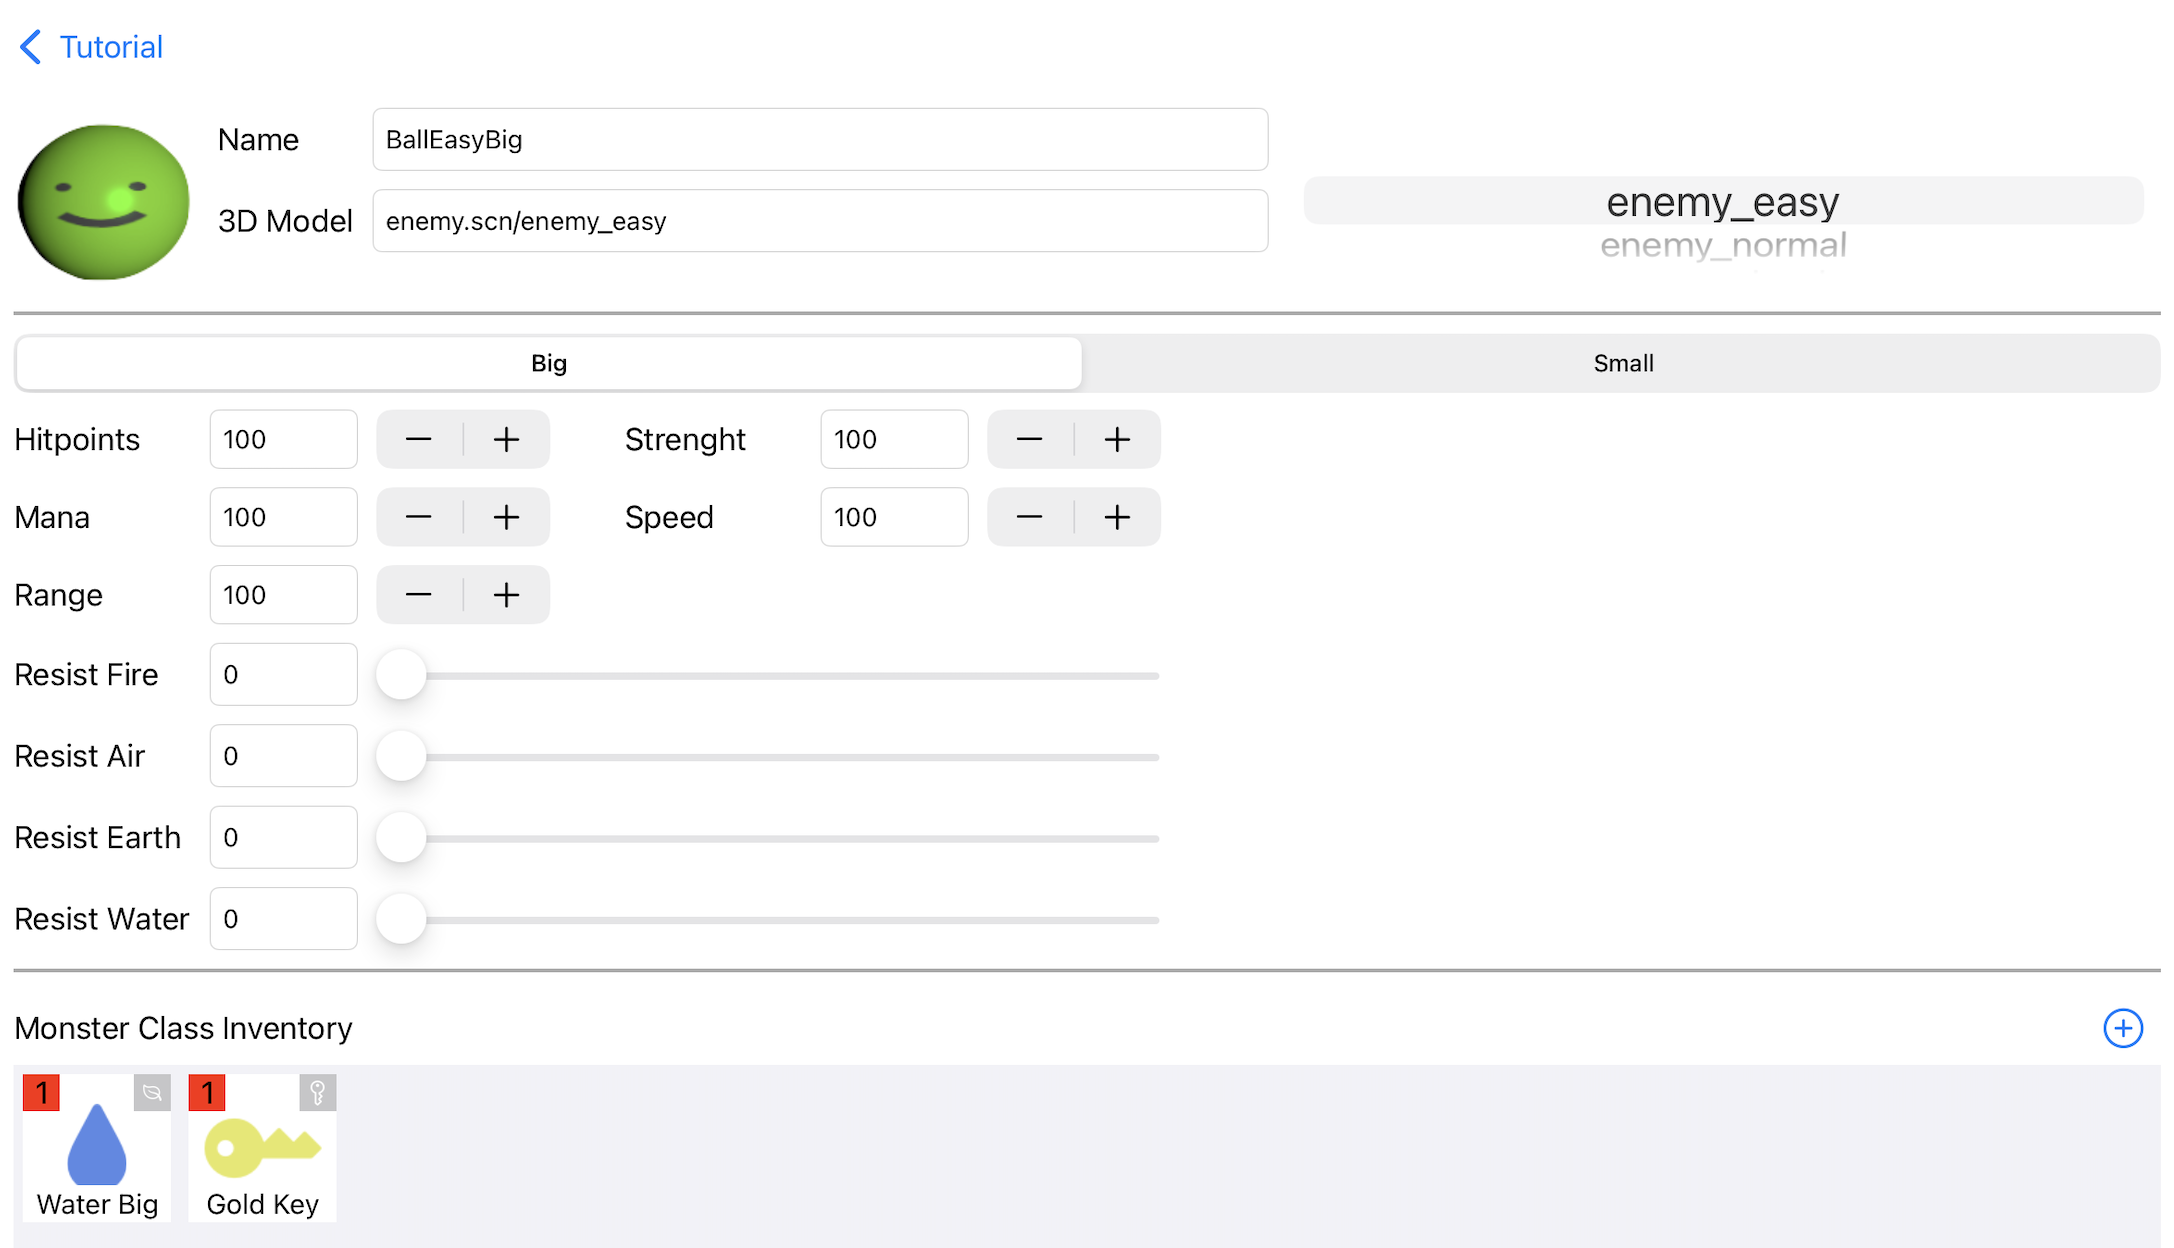
When creating or editing a custom monster, you can configure the following properties:
Monster Size
Choose between two size options:
- Small: Multiple small monsters (up to 4) can be placed on a single tile, creating swarms or groups
- Large: Only one large monster can be placed per tile, creating boss-like encounters
3D Model
Select the visual appearance of your monster from the available 3D models. Each model has a distinct shape and silhouette that affects how threatening the monster appears to players.
Color Customization
Customize your monster’s appearance by choosing color(s). Depending on the selected 3D model, you can at least set the Primary color which is the main body color.
Monster Stats
Configure the combat statistics for your monster
- Speed: How fast the monster moves and attacks
Balance Tip: Early-level monsters should have lower stats, gradually increasing for later levels to create proper difficulty progression.
Inventory & Dropped Items (optional)
Add items that the monster drops when defeated:
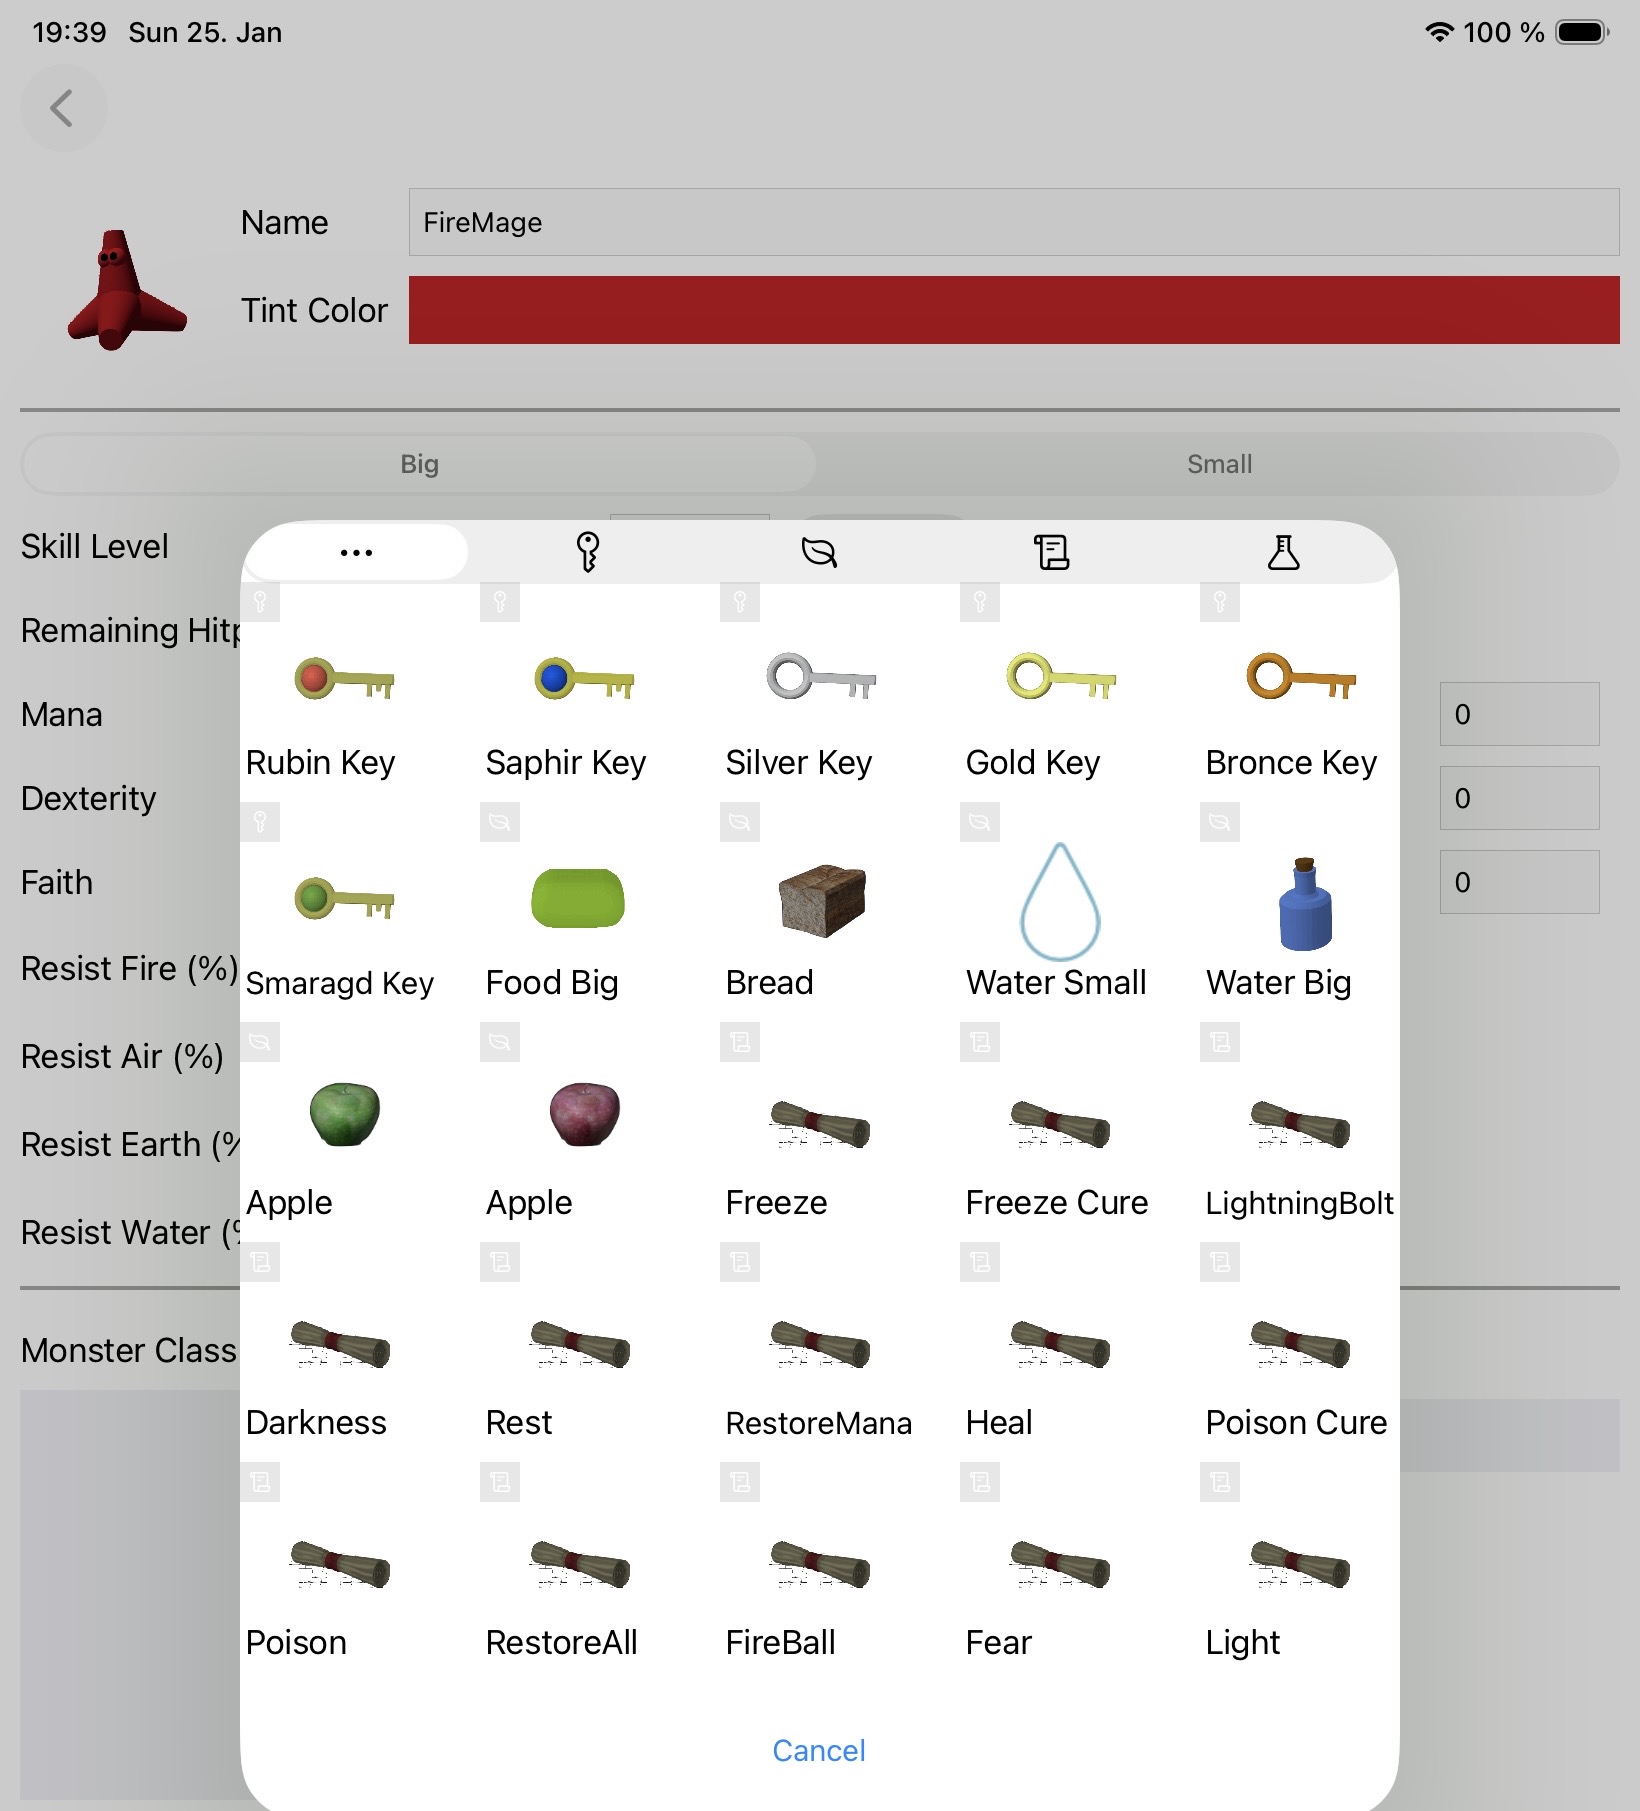
- Generic items: Food, potions, or treasure that all monsters of this type drop
- Common drops: Items players can expect to receive regularly
Best Practice: Use this for generic loot like food. For special items like keys, add them to specific monster instances when placing them in levels, not to the monster class definition.
Magic Abilities (optional)
Choose which spells the monster can cast. Common Spells are: Fireball, lightning bolt, poison cloud, etc.
Strategy Tip: Spell-casting monsters create more dynamic combat encounters and require players to use strategy rather than brute force.
Using Monsters in Your Levels
Once you’ve created or selected monsters, you need to place them in your levels. The process for adding monsters to specific tiles and configuring their behavior is covered in detail here: