Tutorial - Create / Organize GameItems
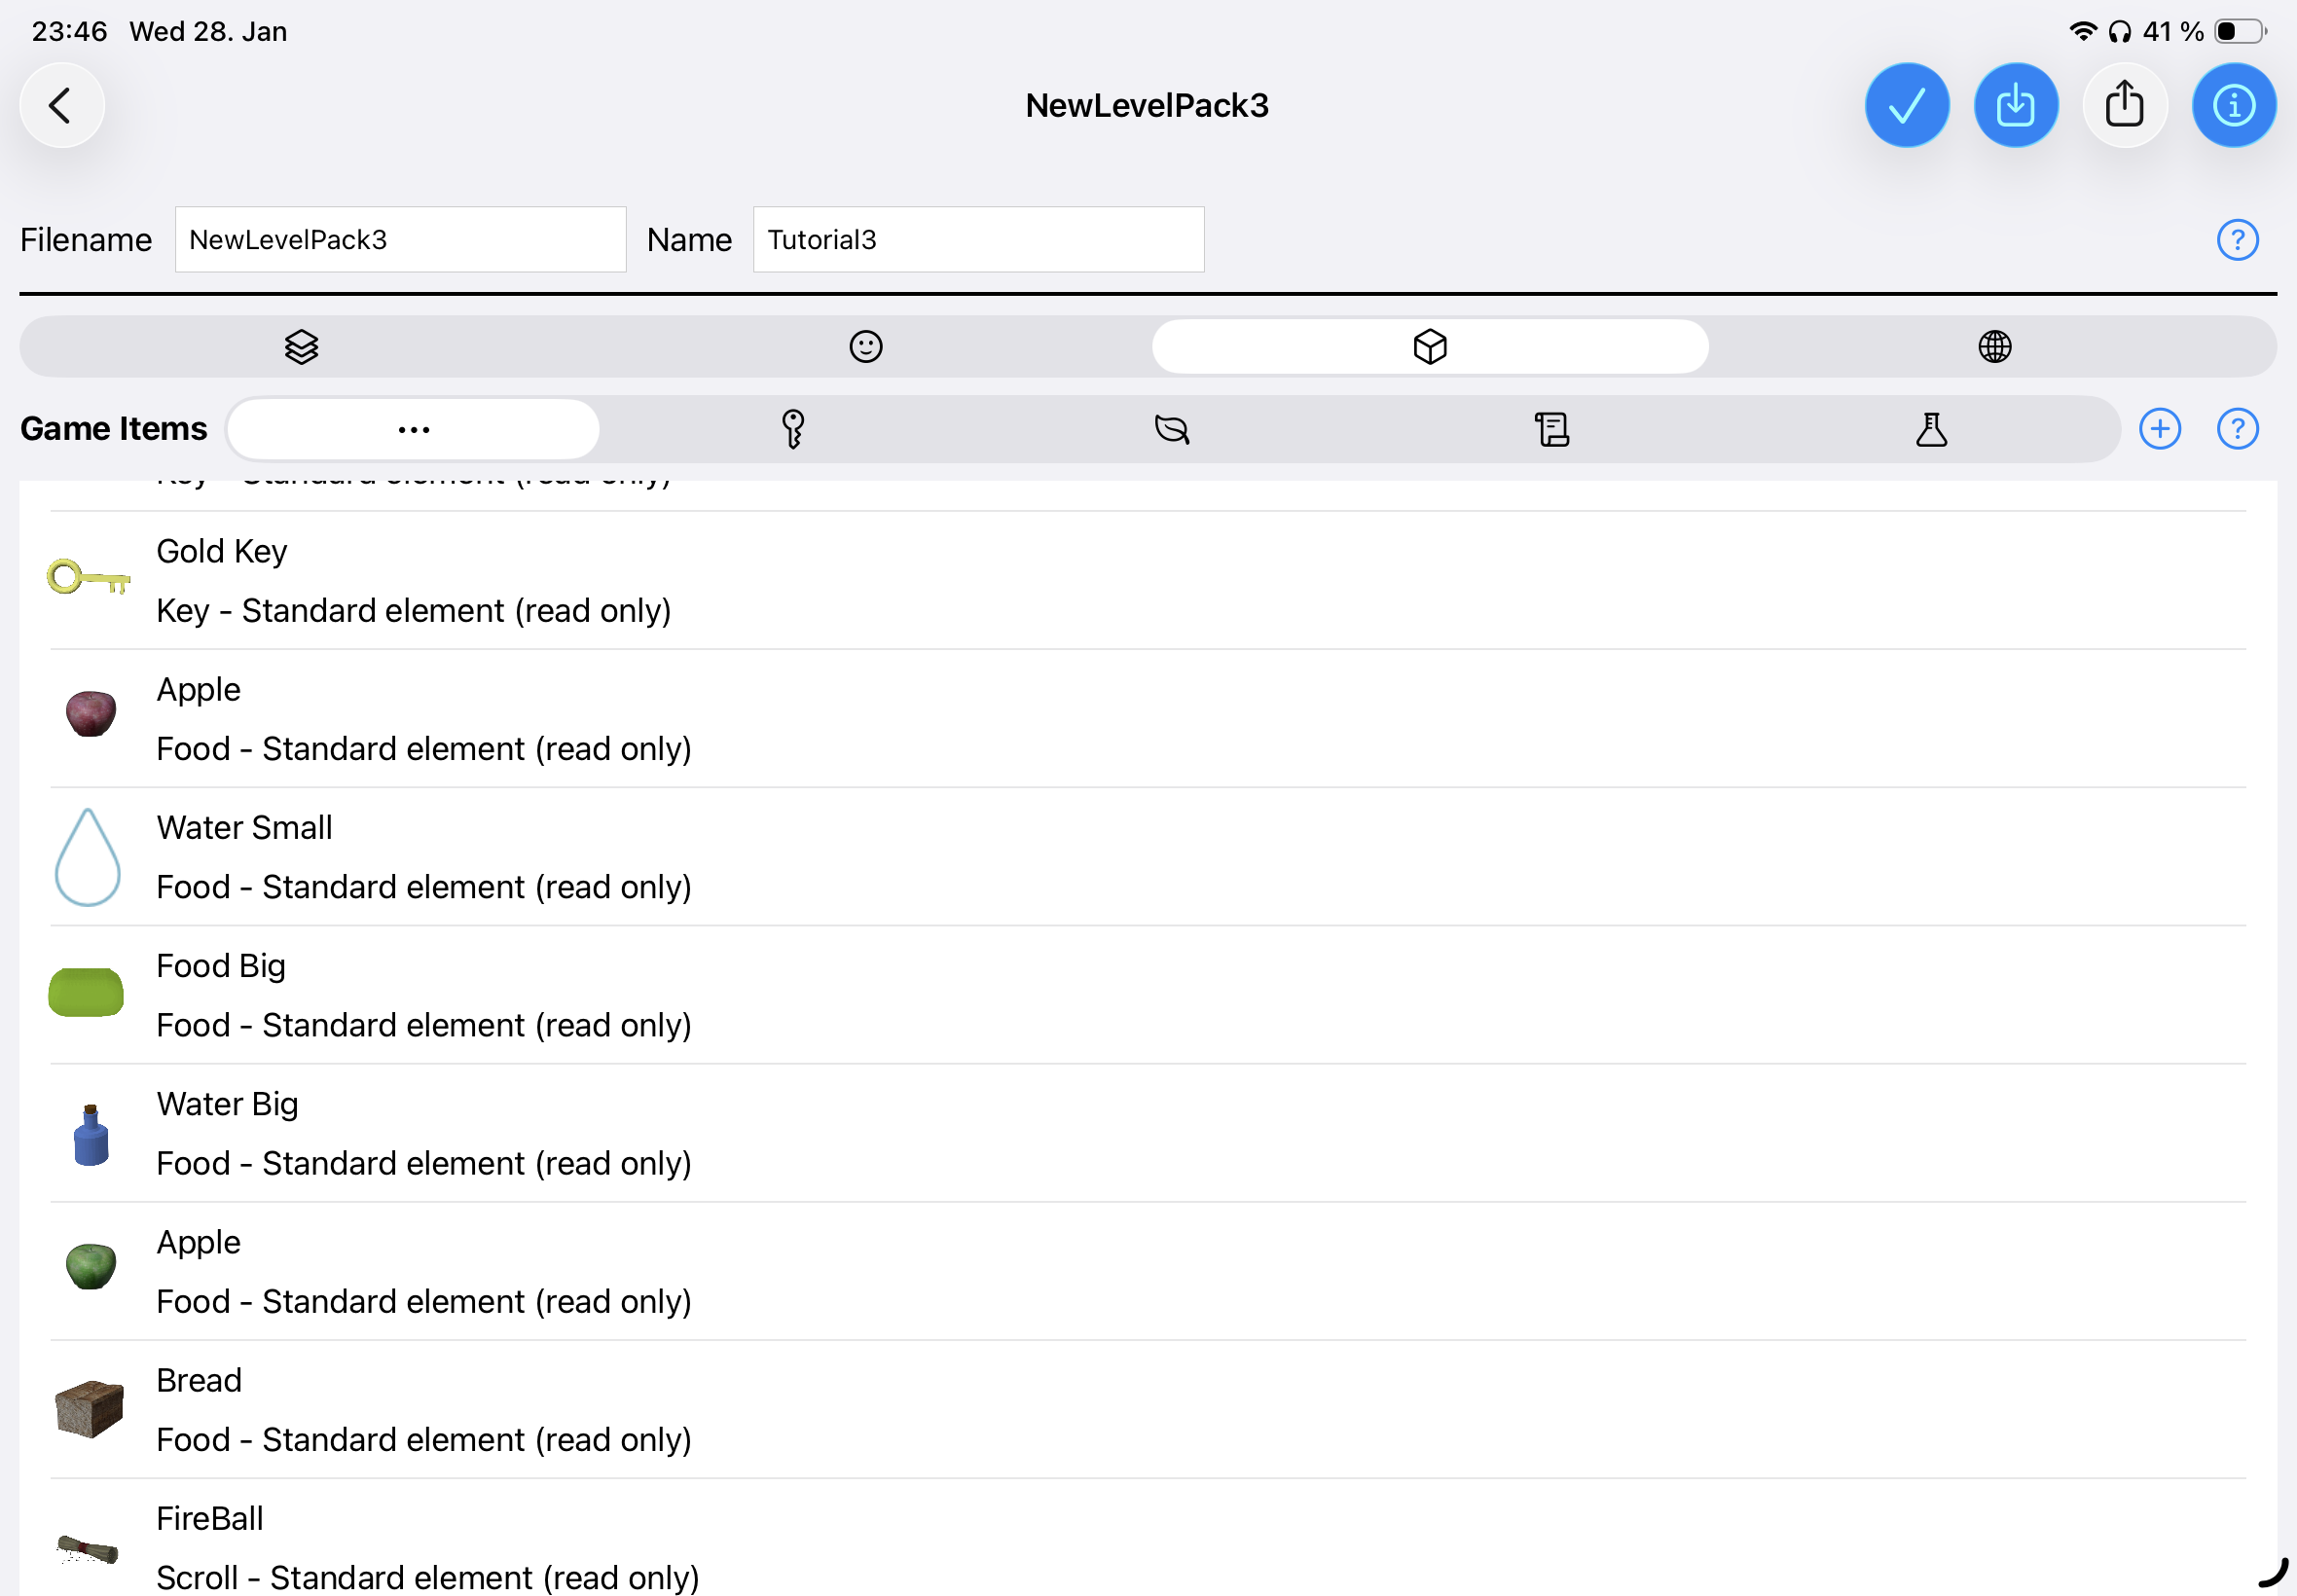
Game items bring depth and complexity to your dungeon gameplay. They can be keys for locks, food for healing, scrolls with messages or spells, and potions with various effects. Items reward exploration, enable puzzle solutions, and provide strategic choices for players.
Built-in vs Custom Items
You have two options when working with game items:
Built-in Items
- Pre-configured: Ready to use with established effects
- Cannot be modified: Their properties are locked
- Quick to deploy: Perfect for standard dungeon items
- Tap to view: You can view their details in read-only mode
Custom Items
- Fully customizable: Control appearance, name, and effects
- Unique designs: Create items that fit your level pack’s theme and story
- Can be modified: Adjust properties anytime
- Can be deleted: Remove custom items you no longer need
Item Types
The Level Editor supports several types of game items:
- Keys: Unlock doors and chests with color-coded matching
- Food: Restore health and provide sustenance
- Scrolls: Display text messages or teach magic spells
- Potions: Provide temporary buffs, permanent upgrades, or healing effects
- Wearables: Armor and clothing that grant defense and stat bonuses while equipped
Filter Bar

Use the filter bar at the top of the item list to show only specific item types. This makes it easier to find the item you’re looking for when you have many custom items.
Create a New Item
To create a custom item:
- Click the + button at the top of the item list
- The item detail screen will open
- Select the item type and configure all properties (including weight, which affects how much the player can carry)
- Save your new item
If you have a filter active when you press +, the new item is pre-set to that filtered type — so creating several food items in a row no longer means switching the type every time.
To delete a custom item, swipe left on an item row and tap delete. Note: Only custom items can be deleted; built-in items are permanent.
Live 3D Preview
The item detail screen includes a live 3D preview alongside the icon thumbnail:
- Tap the preview to switch to a different 3D model variant for the current item type
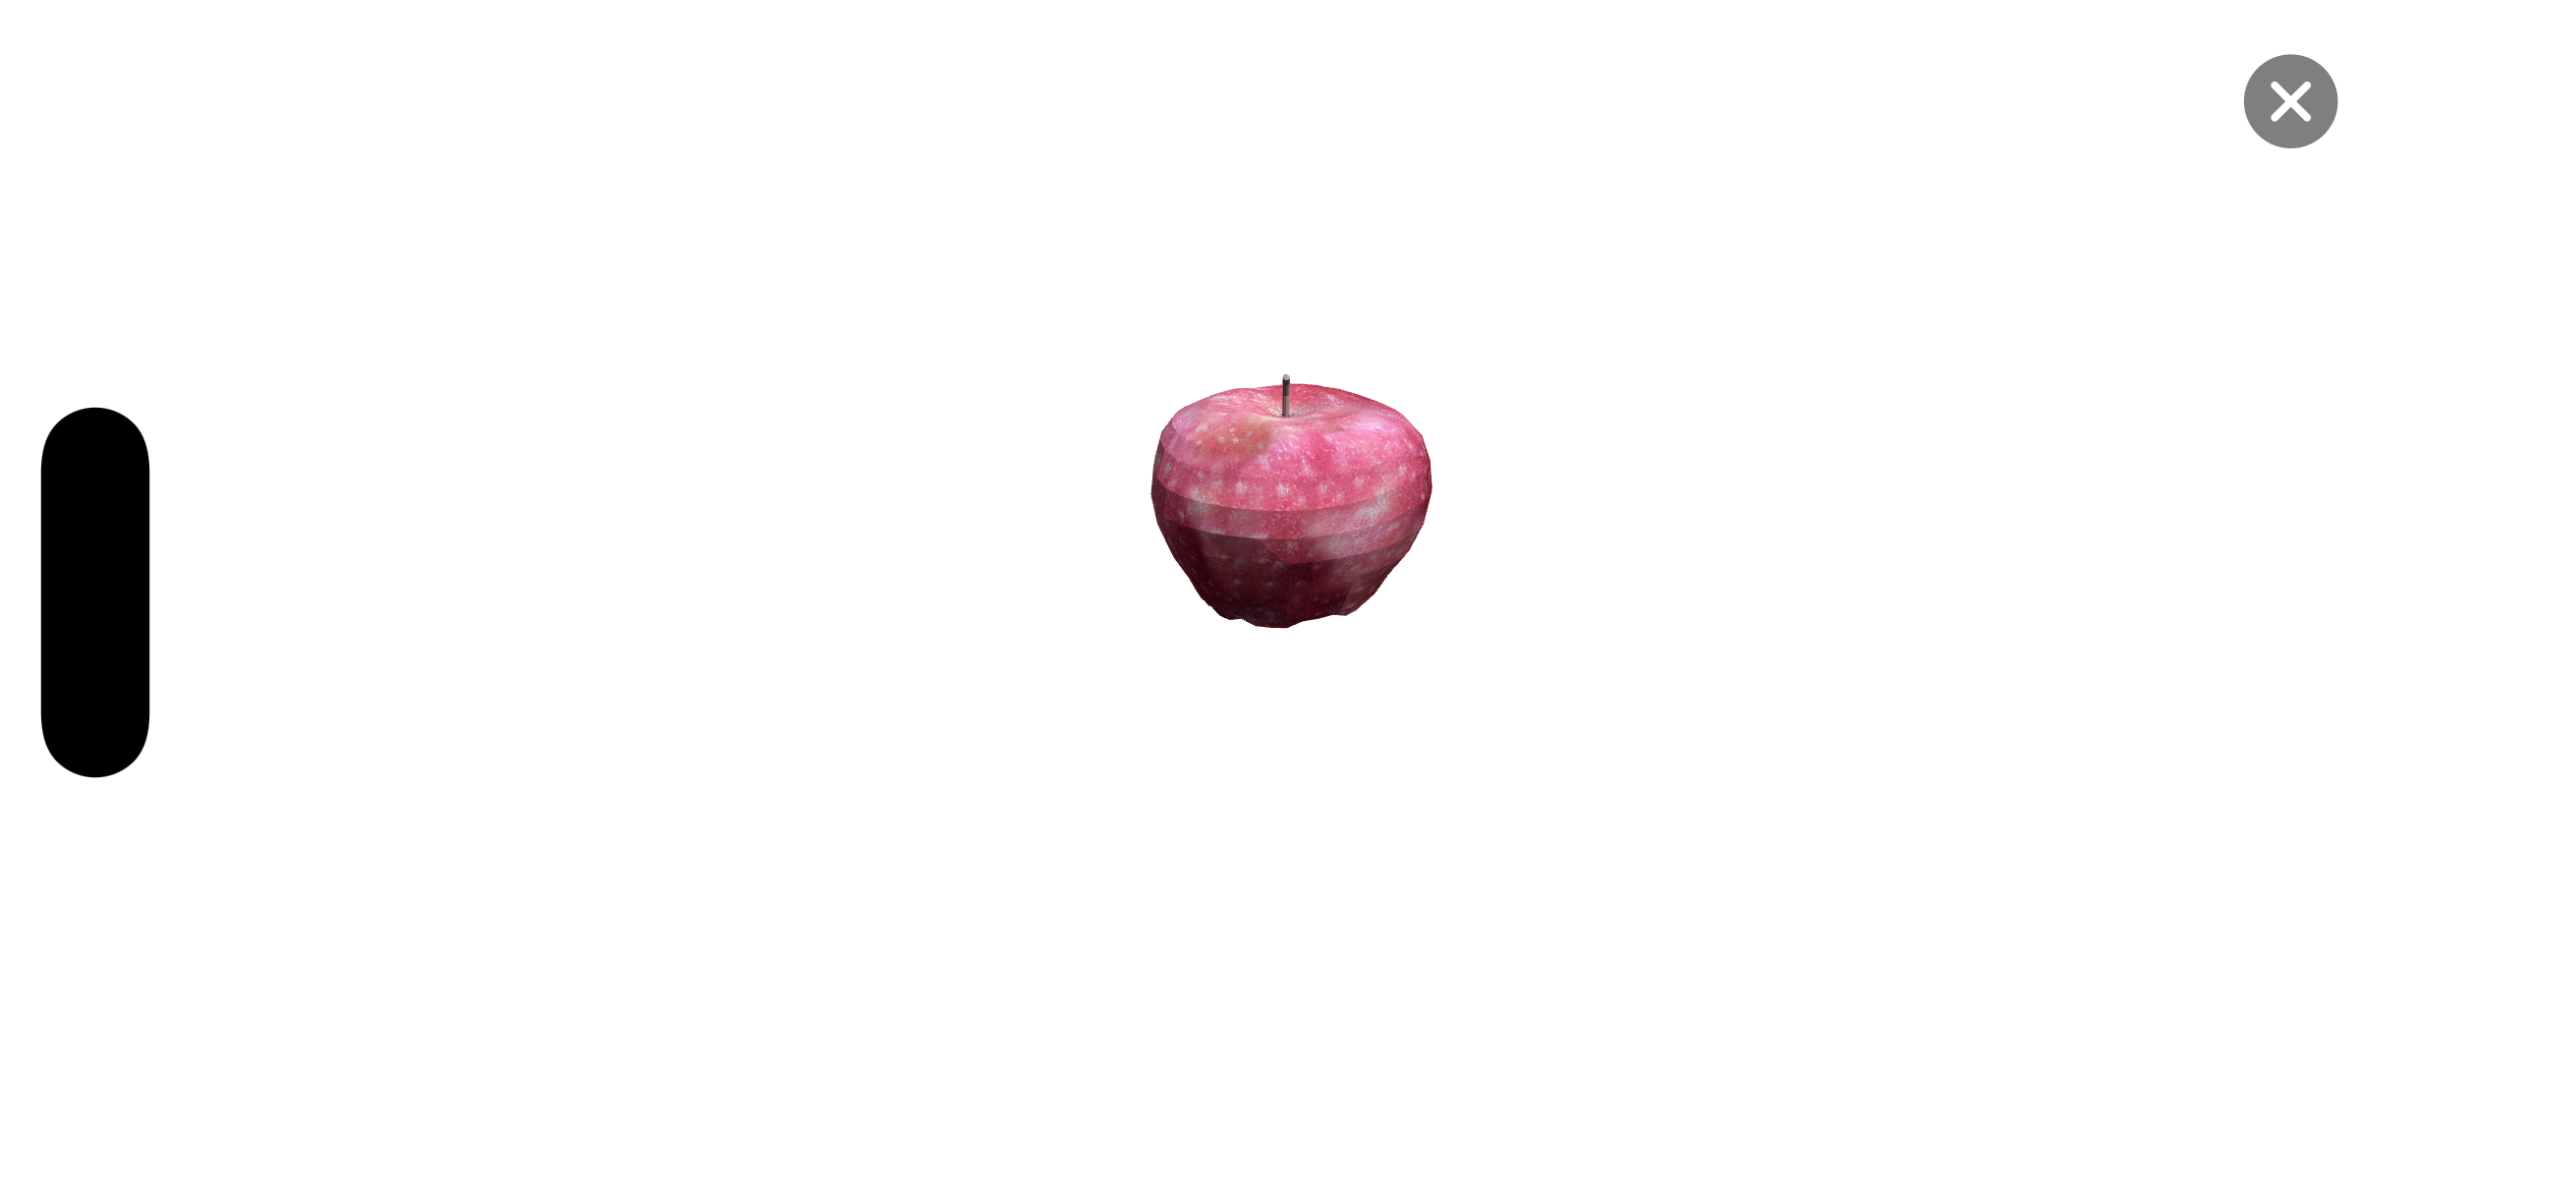
- Tap the expand button in the corner to inspect the model in fullscreen (rotate and zoom freely)
- Any change you make to materials, textures or the icon is reflected immediately in both the preview and the icon thumbnail
Materials System
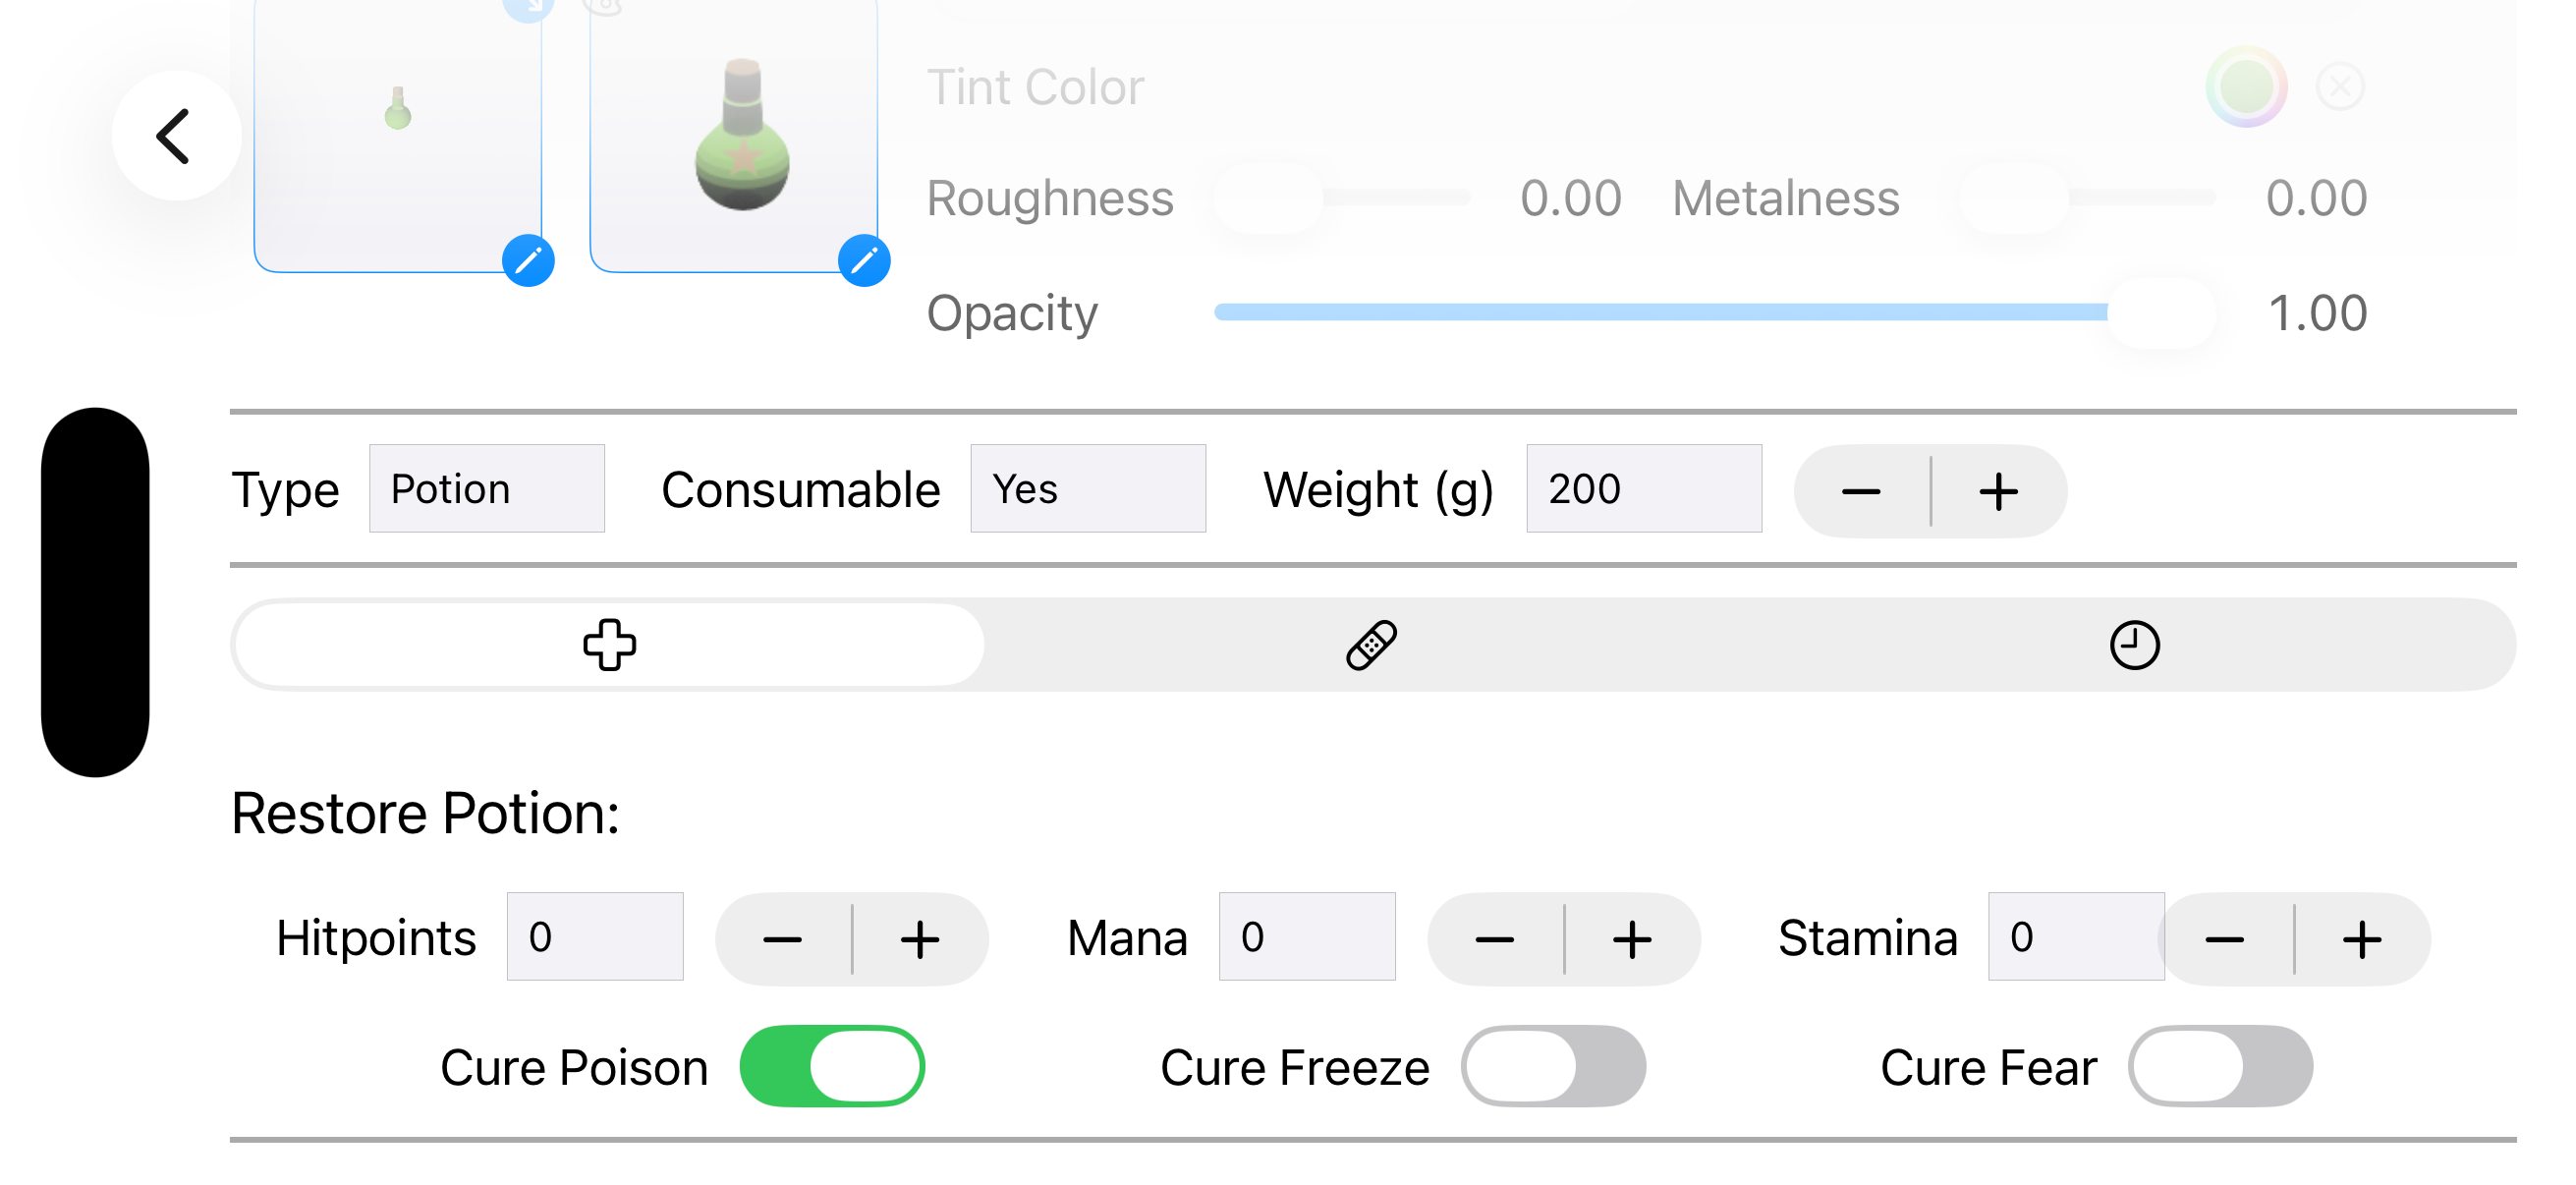
Each item’s surfaces are described by a materials list. The number of material slots depends on the 3D model (most have 1, some — like bottles, flasks and gem keys — have 2). The segmented control above the editor lets you switch between slots when more than one is available.
Each material exposes the following properties:
- Texture: An image map applied to the surface (only available for models that ship with textures, such as scrolls, apples and bread).
- Tint Color: A color applied to the material. On models with a tintable texture this is multiplied over the texture, letting you recolor textured items (e.g. a red, green or golden apple). On models without a texture it is used as the flat surface color.
- Roughness (0–1): How matte vs. glossy the surface looks.
- Metalness (0–1): How metallic the surface looks — useful for keys, weapons and armor.
- Opacity (0–1): How transparent the material is — useful for liquids inside potion flasks.
Texture and Tint Color are independent and can be combined on the same material. Use the × button next to either to clear it.
What This Enables
- Multiple colored keys for complex puzzles
- Different colored potions, flasks and liquids for various effects
- Tinted variations of textured items (red apple, green apple, golden apple, …)
- Metallic, glossy or matte finishes per material slot
Icon Selection
When creating an item, choose an icon that represents it in the game inventory. For tintable items, the icon will automatically match the colors you selected. The icon appears:
- In the item placement dialog in the Level Editor
- In the player’s inventory during gameplay
- When items are displayed on the ground
Custom Keys
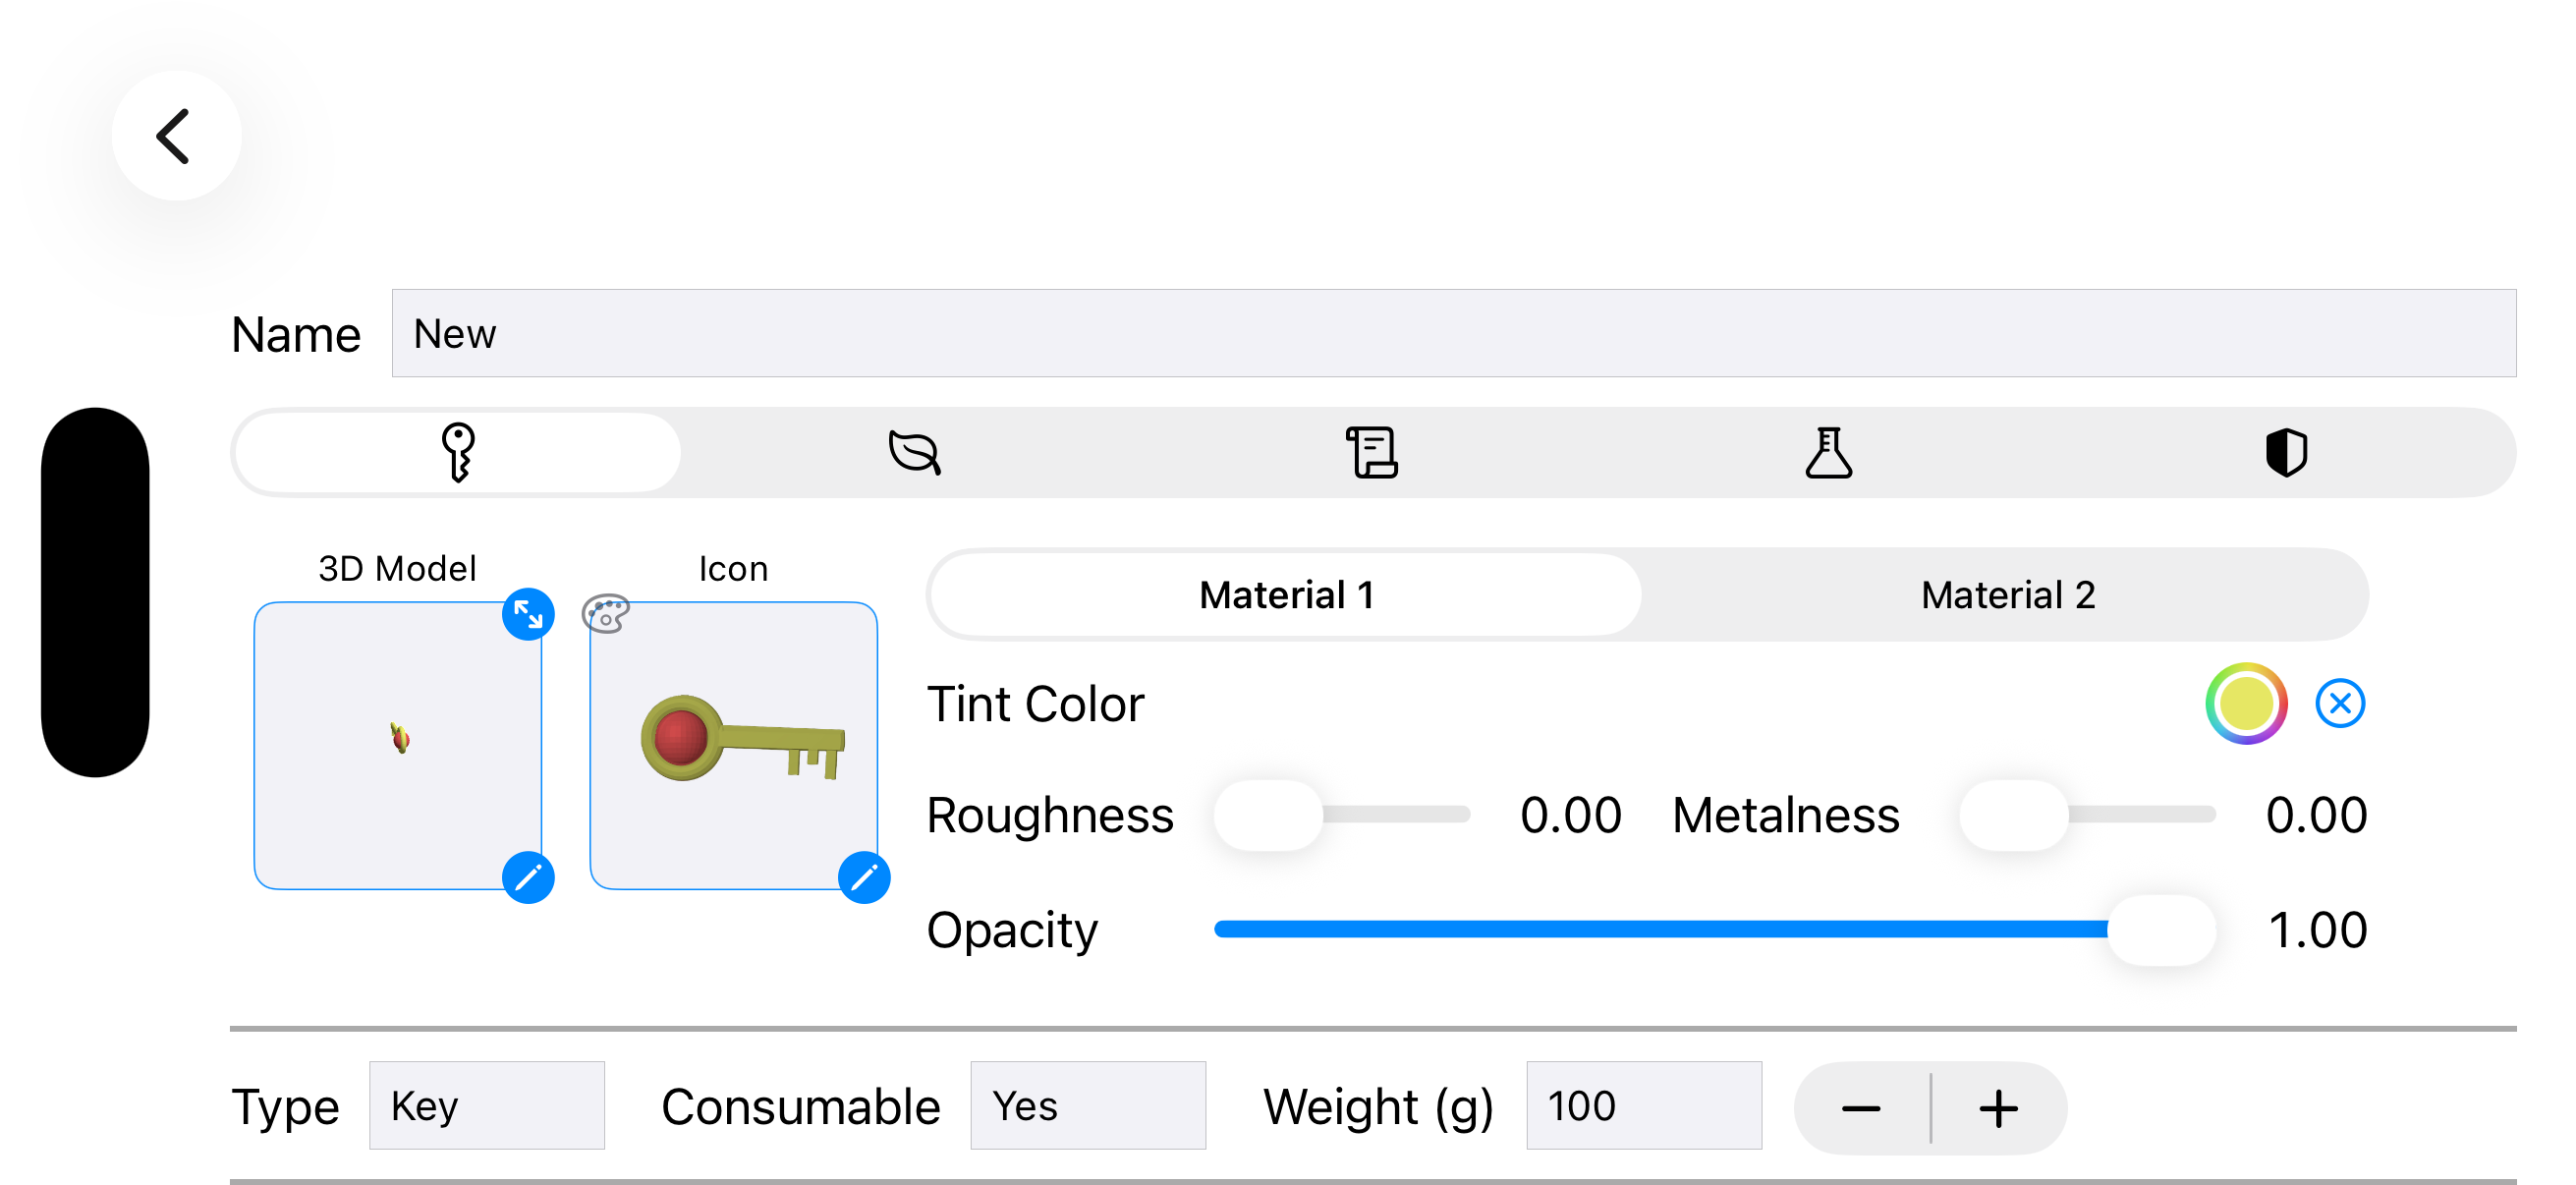
Keys are essential for dungeon puzzles. The key system uses the tinting feature to create color-coded matching:
Creating Custom Keys
- Select the key 3D model (regular keys have 1 material slot, gem keys have 2)
- Pick a tint color per material slot — and optionally raise metalness for a metallic look
- Give the key a descriptive name
- The key will only open doors/chests with matching colors
Key Puzzle Design
- Use different colored keys for multi-stage puzzles
- Hide keys in hard-to-reach places or behind other puzzles
- Place keys as monster drops for combat-based progression
Tip: Use consistent color schemes across your level pack so players can recognize key-lock relationships at a glance.
Custom Food Items
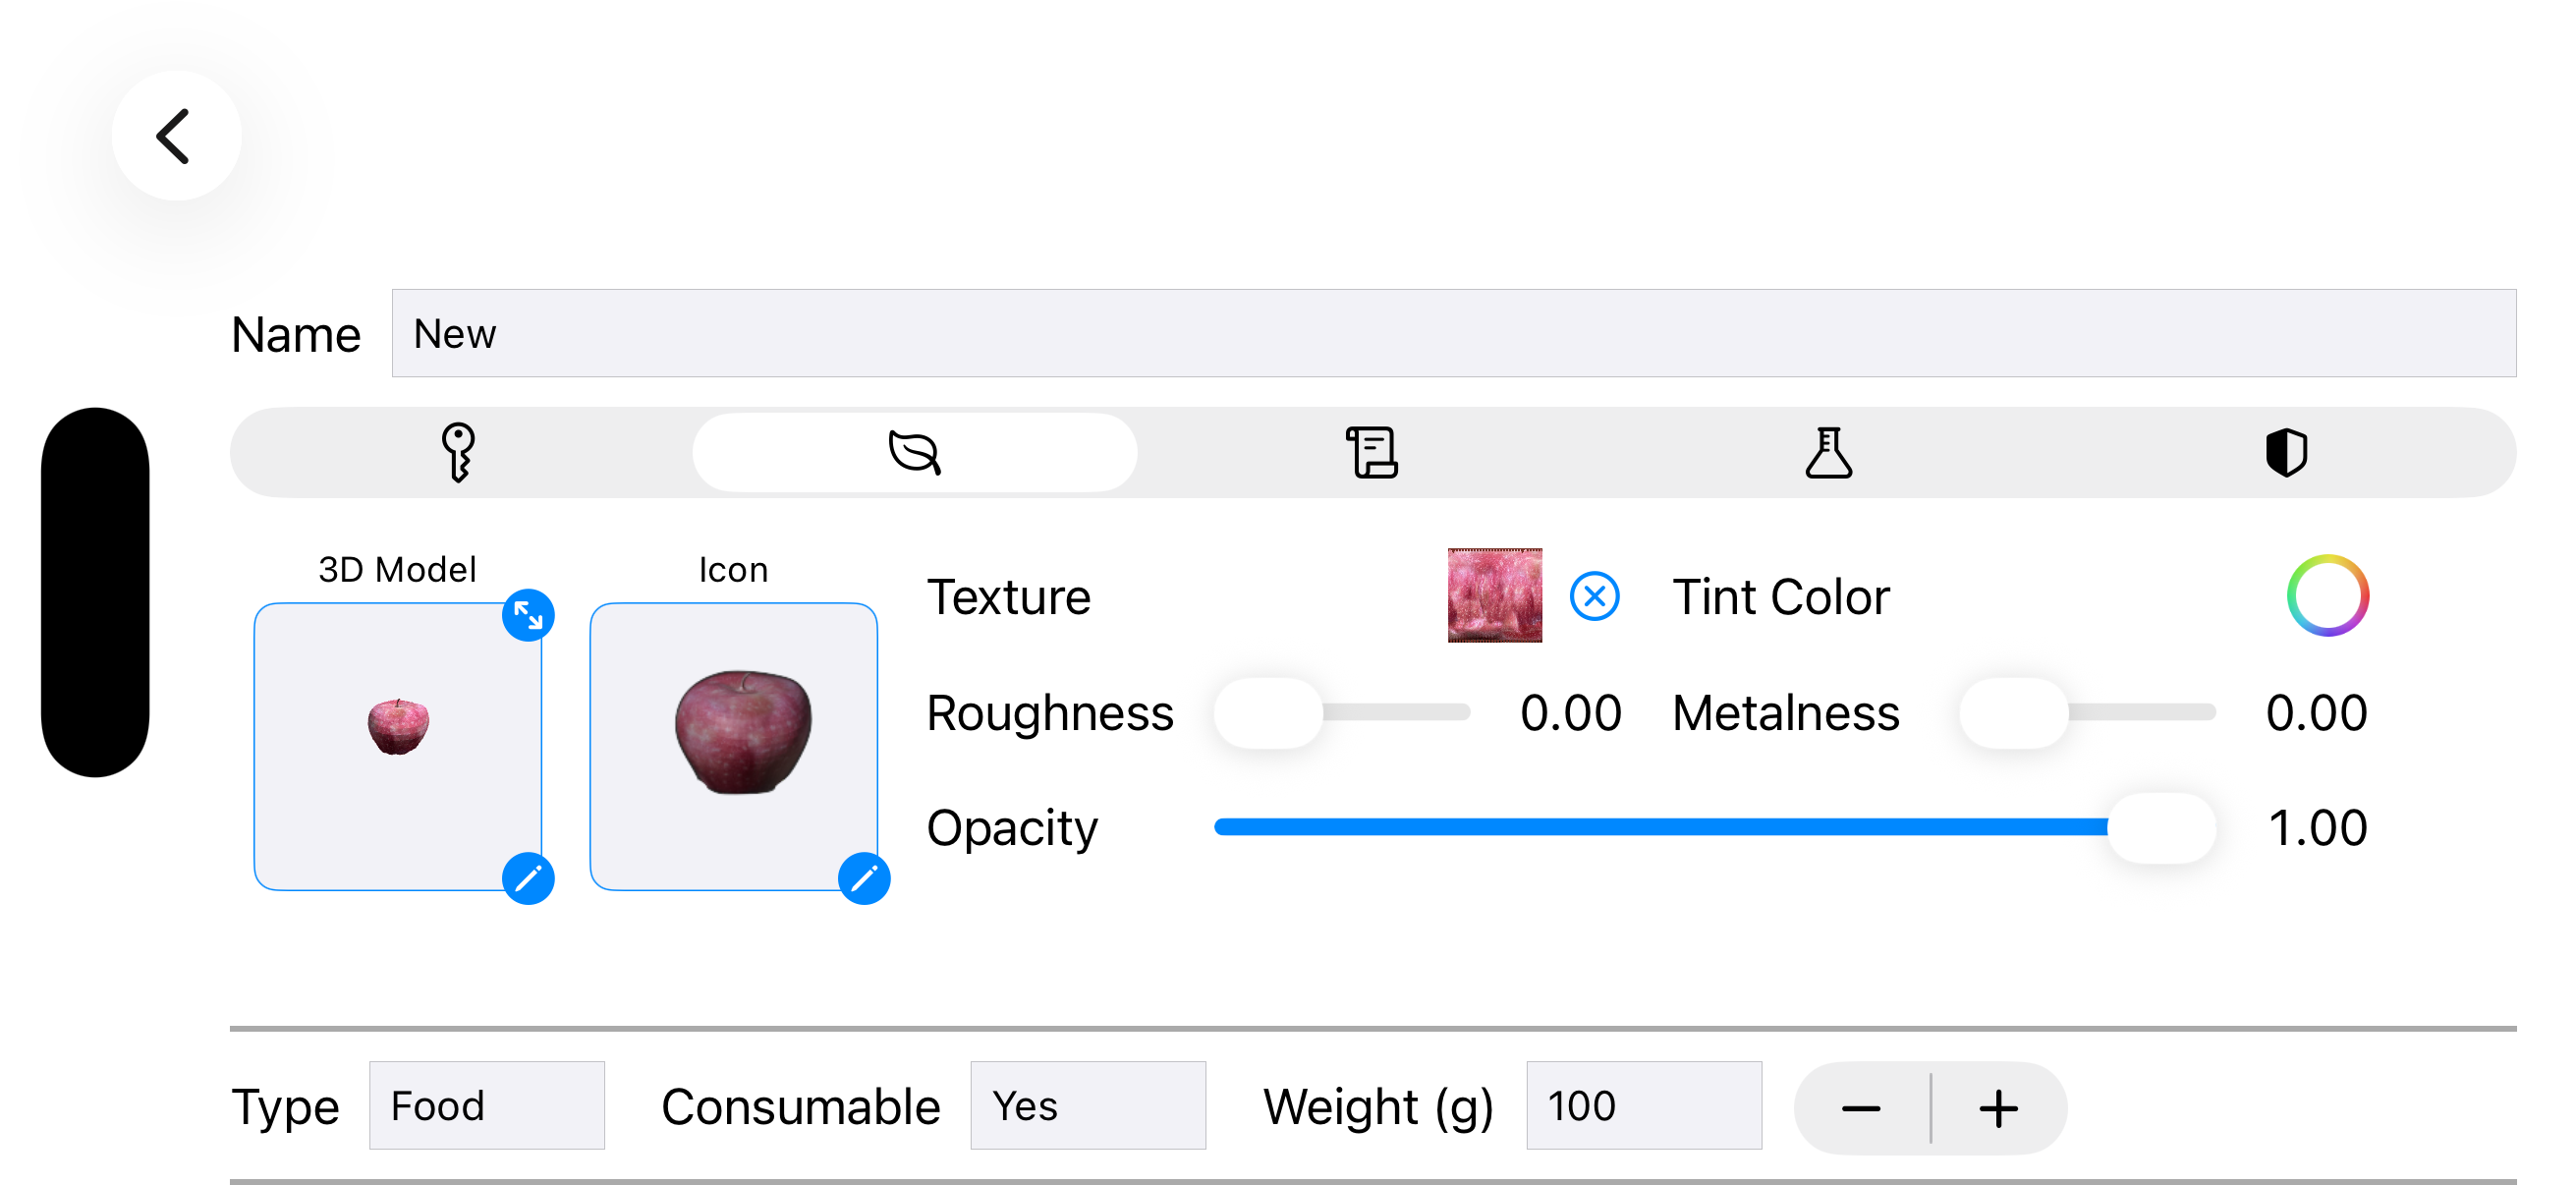
Food items restore the player’s health and provide strategic healing opportunities.
Creating Custom Food
- Select a food 3D model (bread, apples, meat, etc.)
- Pick a texture (where available) and/or a tint color — combining both lets you recolor textured foods (e.g. a red, green or golden apple)
- Set the healing amount
- Give it a descriptive name
Food Design Tips
- Place basic food frequently for gradual healing
- Add powerful food items as rare rewards
- Use food strategically before difficult encounters
- Consider food as monster drops for sustained exploration
Custom Scrolls
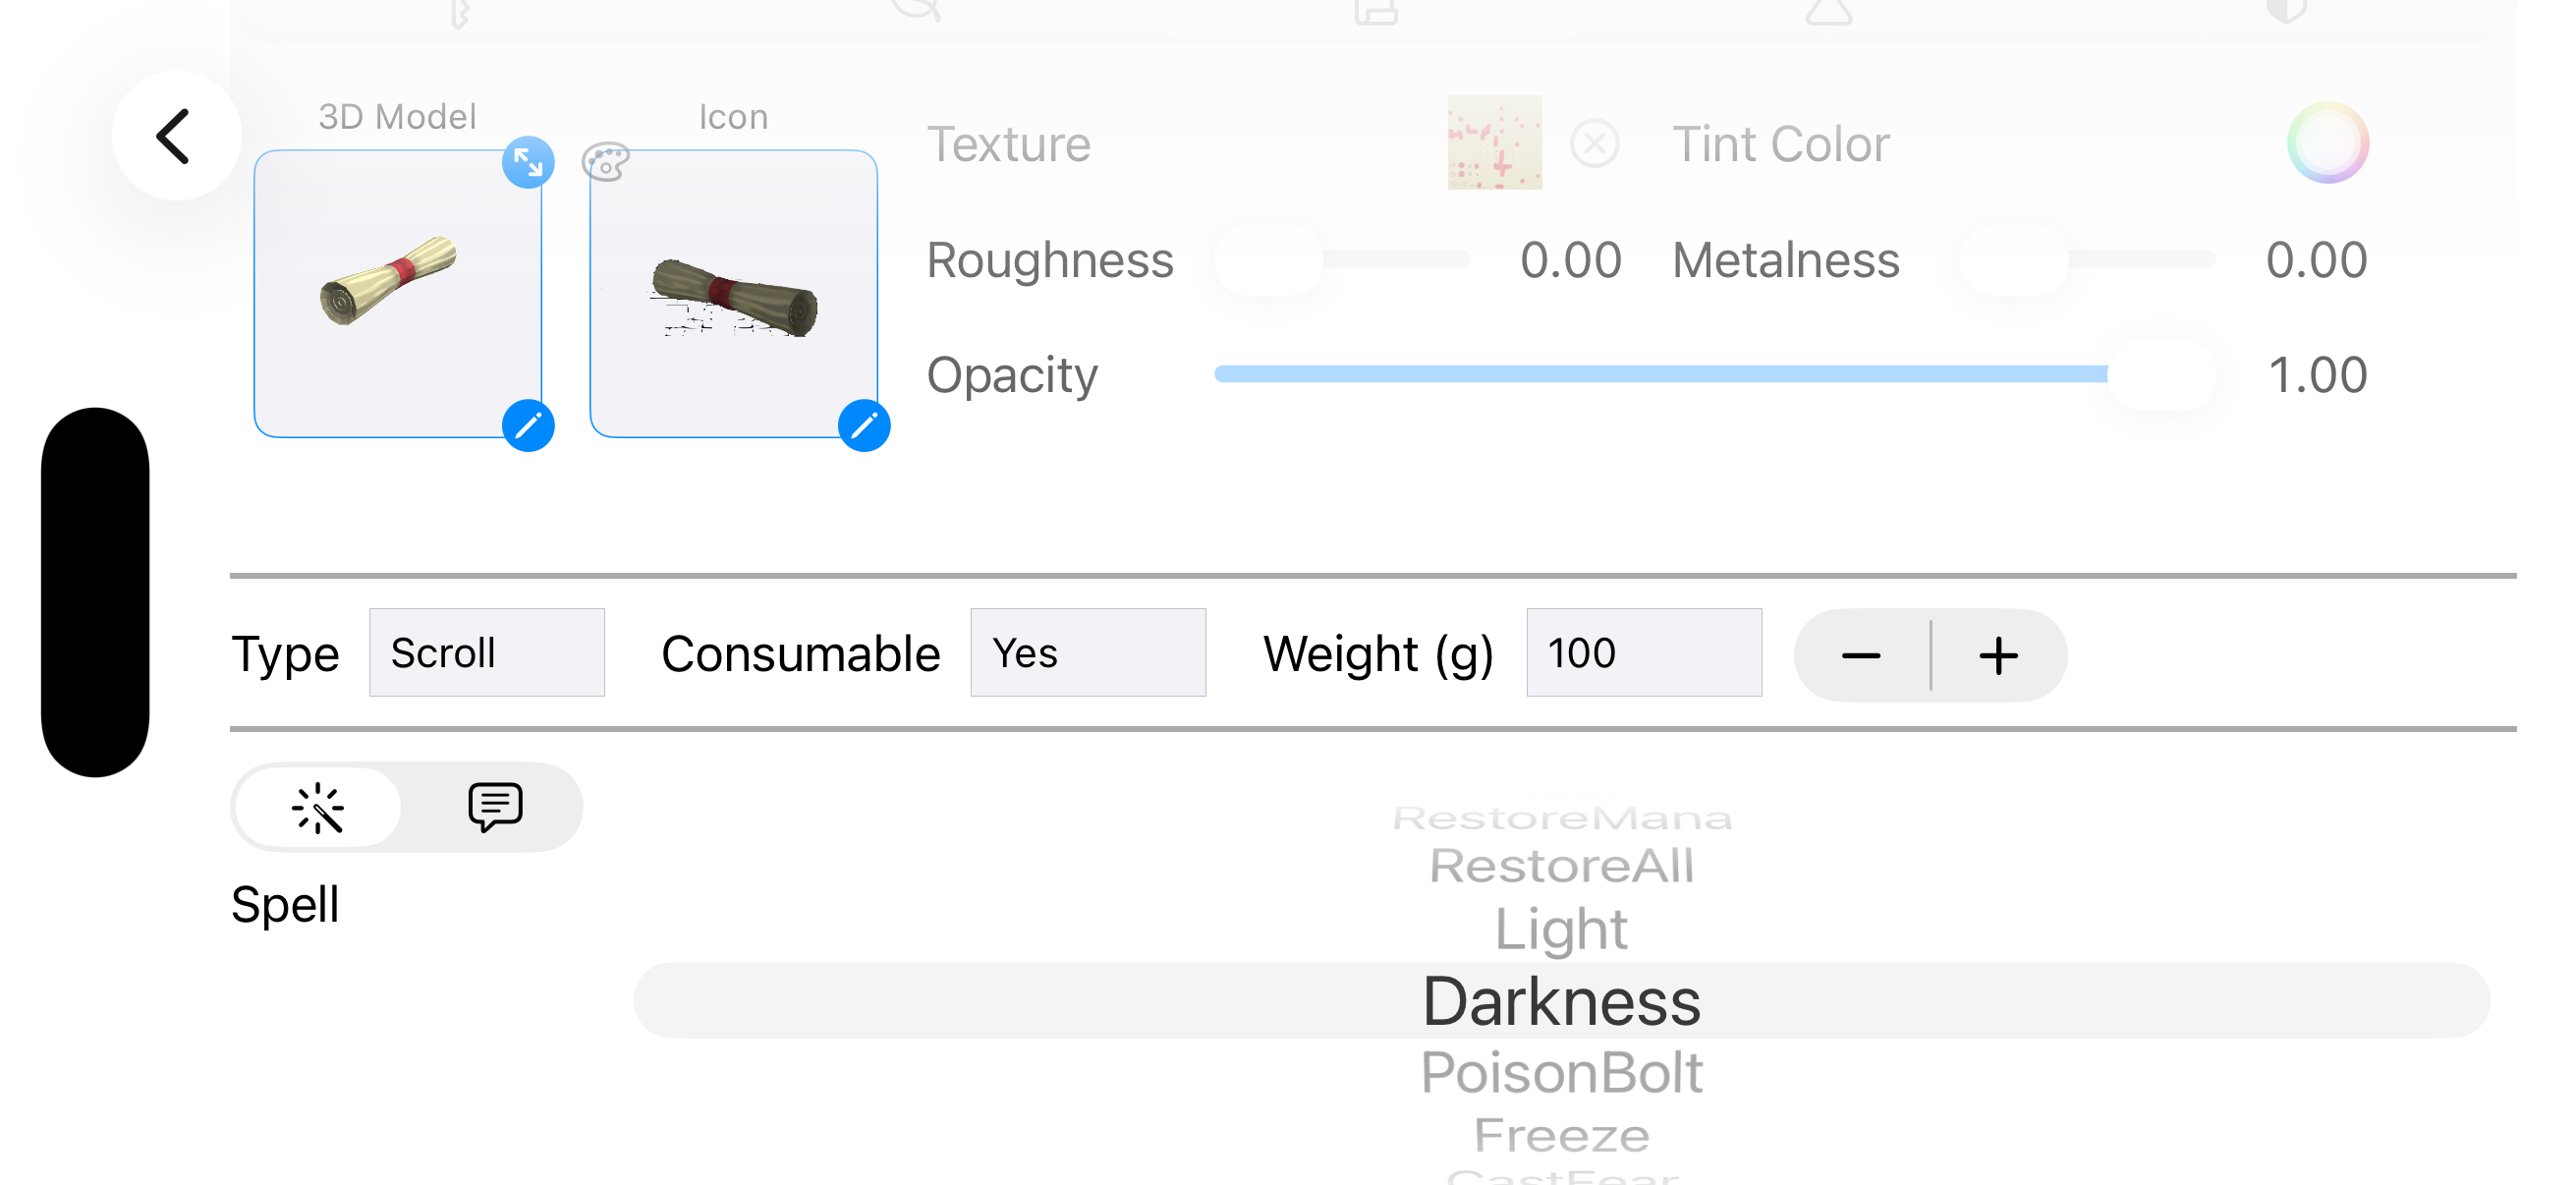
Scrolls serve two purposes in the game:
Spell Learning Scrolls
These teach the player new magic spells. Note: Built-in spell scrolls already exist for all spells, so custom spell scrolls are rarely needed.
Text Scrolls
These display custom text messages to the player. Perfect for:
- Story elements: Tell your dungeon’s backstory
- Hints: Provide puzzle solutions or directions
- Lore: Add flavor text and world-building
- Instructions: Guide players through complex mechanisms
Creating Text Scrolls
- Select the scroll item type
- Choose “Text Scroll” mode
- Enter your message text
- Set the scroll texture
- Name the scroll appropriately
Creative Uses:
- Diary entries from previous adventurers
- Riddles that hint at puzzle solutions
- Warnings about upcoming dangers
- Victory messages when puzzles are solved
Custom Potions
Potions add strategic depth with three distinct types:
Restore Potions (One-Time Use)
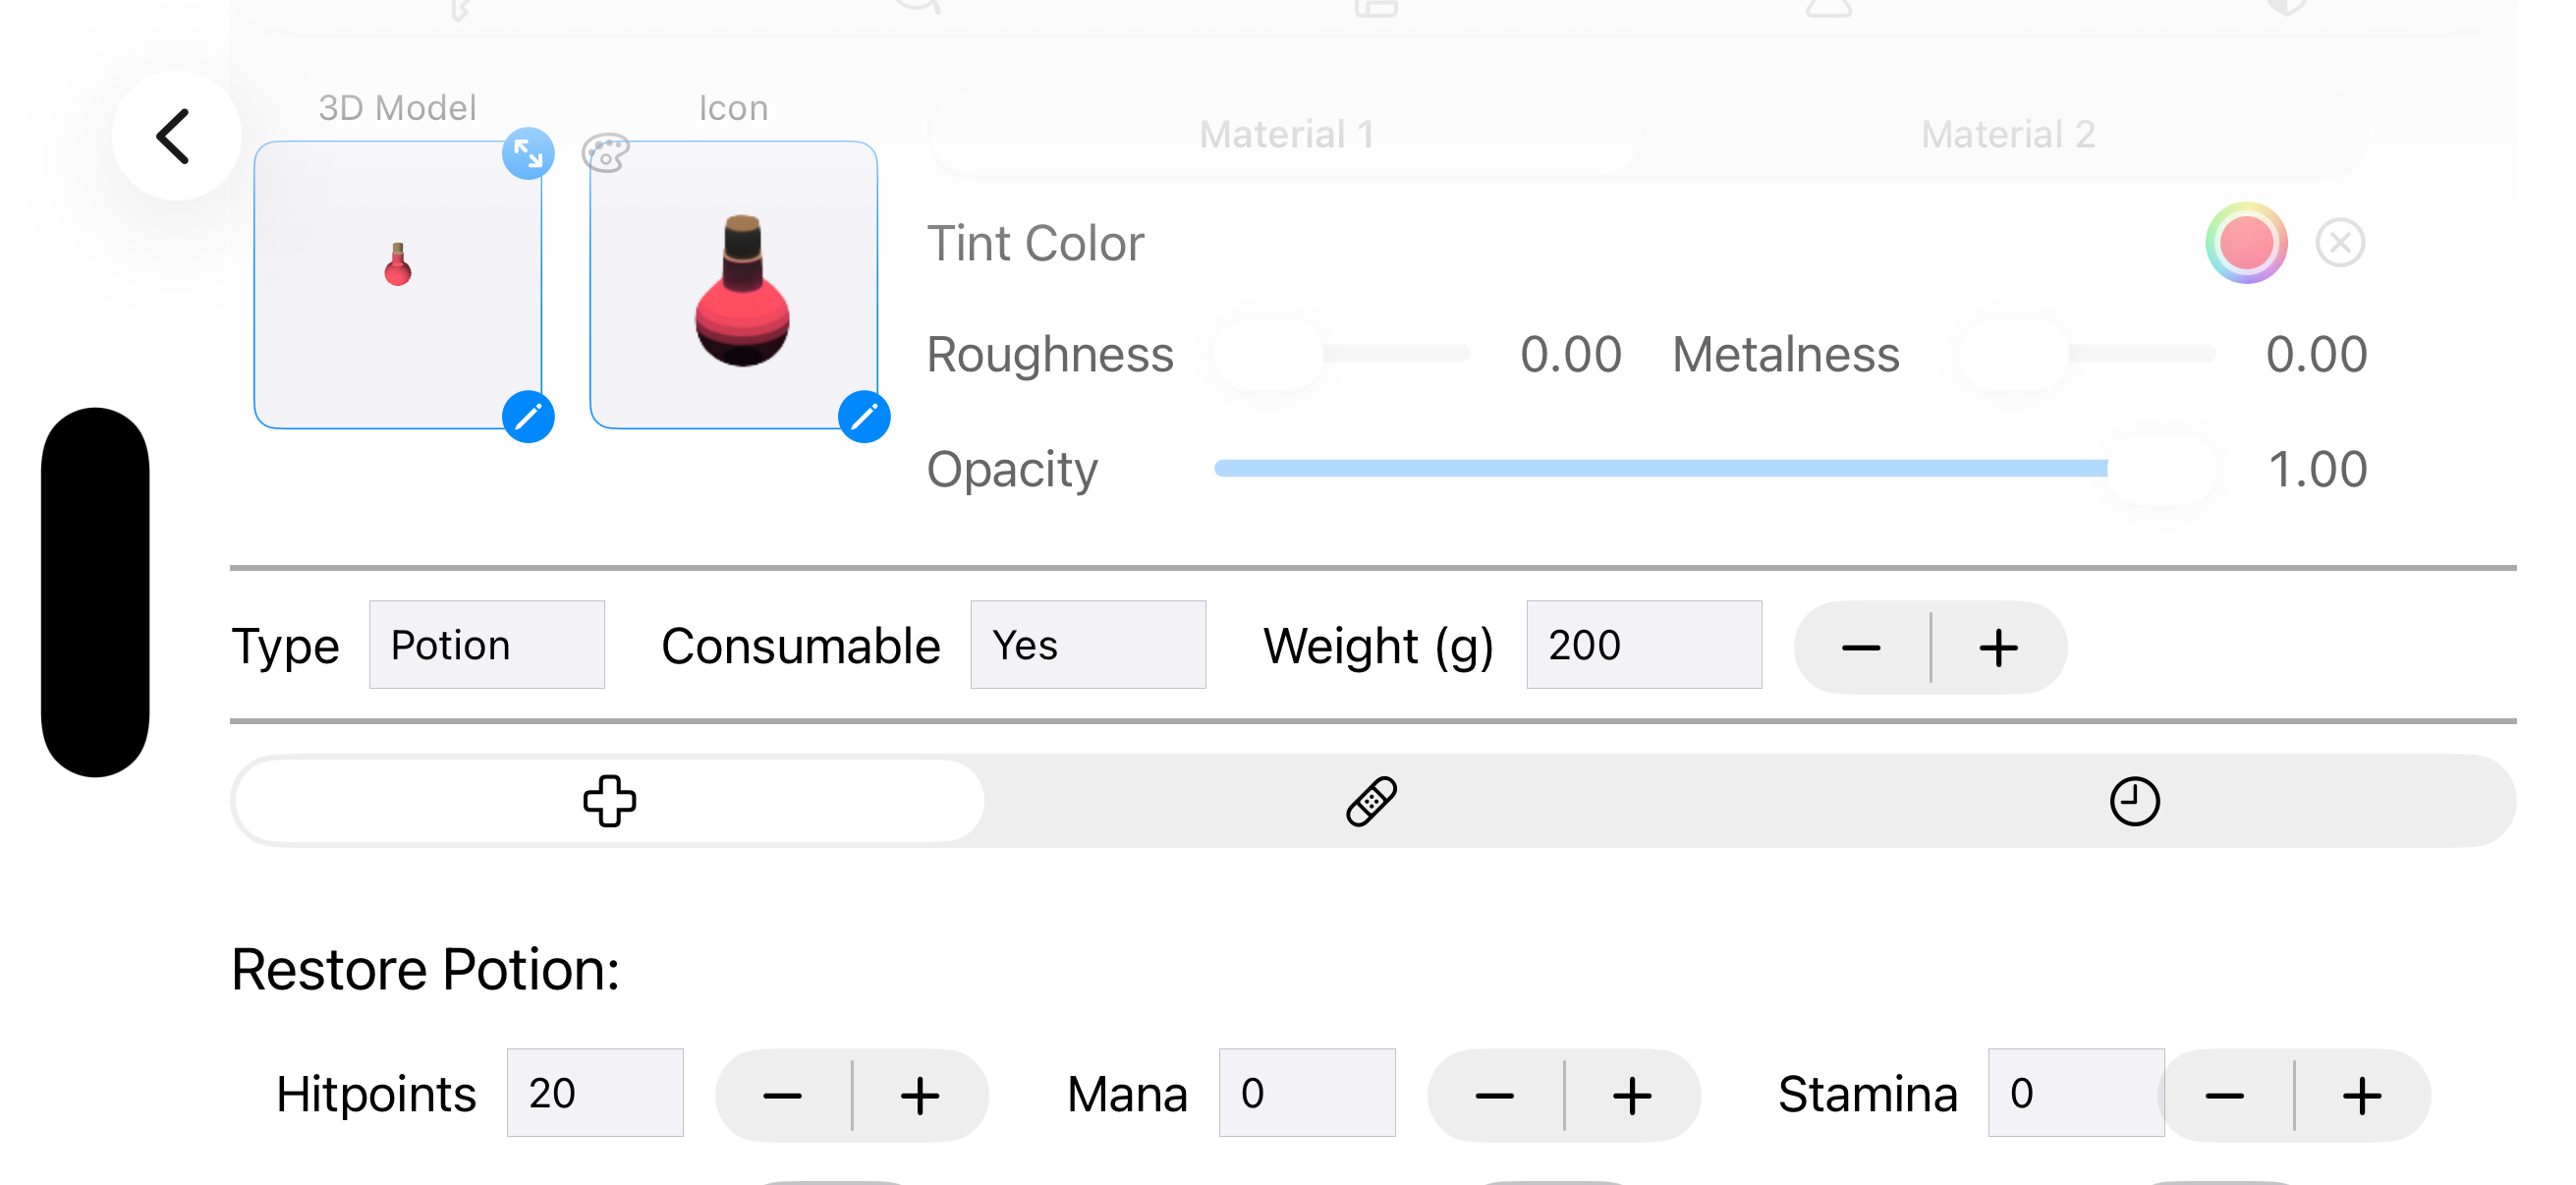
These provide immediate effects and are consumed:
- Healing potions: Restore hitpoints
- Mana potions: Restore magic energy
- Cure potions: Remove negative status effects
Use Cases: Emergency healing, preparing for boss fights, recovering after combat
Permanent Potions
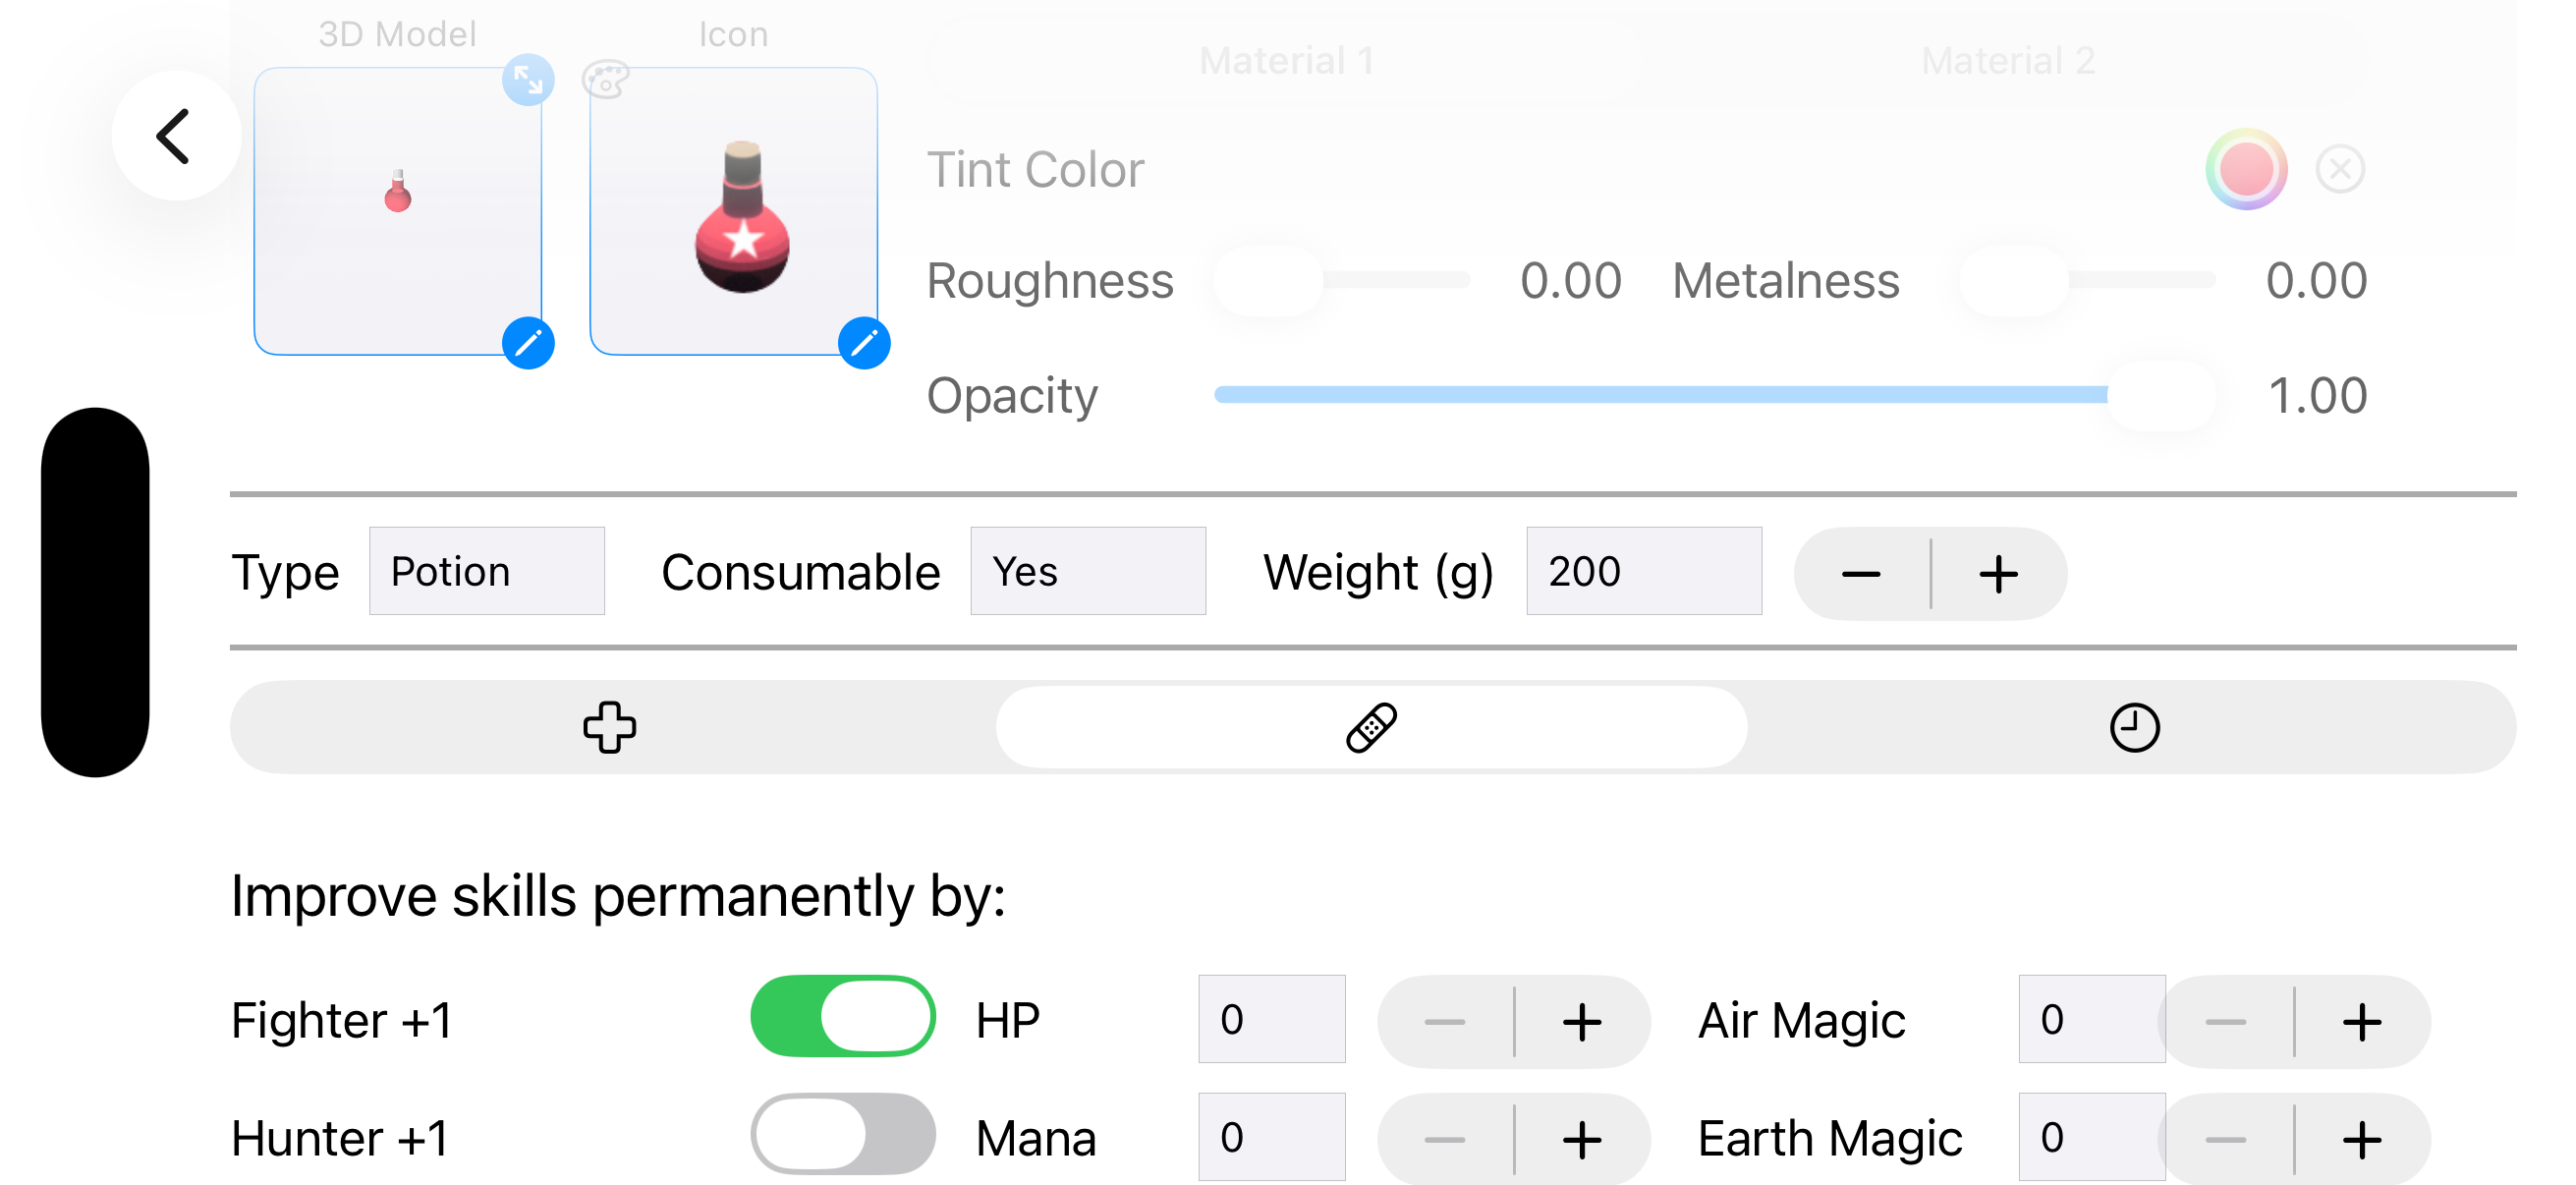
These provide lasting upgrades like:
- Stat increases: Permanently boost strength, defense, etc.
- Max HP increases: Permanently raise maximum hitpoints
- Max Mana increases: Permanently raise maximum mana
Use Cases: Character progression rewards, hidden treasures, quest completion bonuses
Temporary Potions (Buffs)
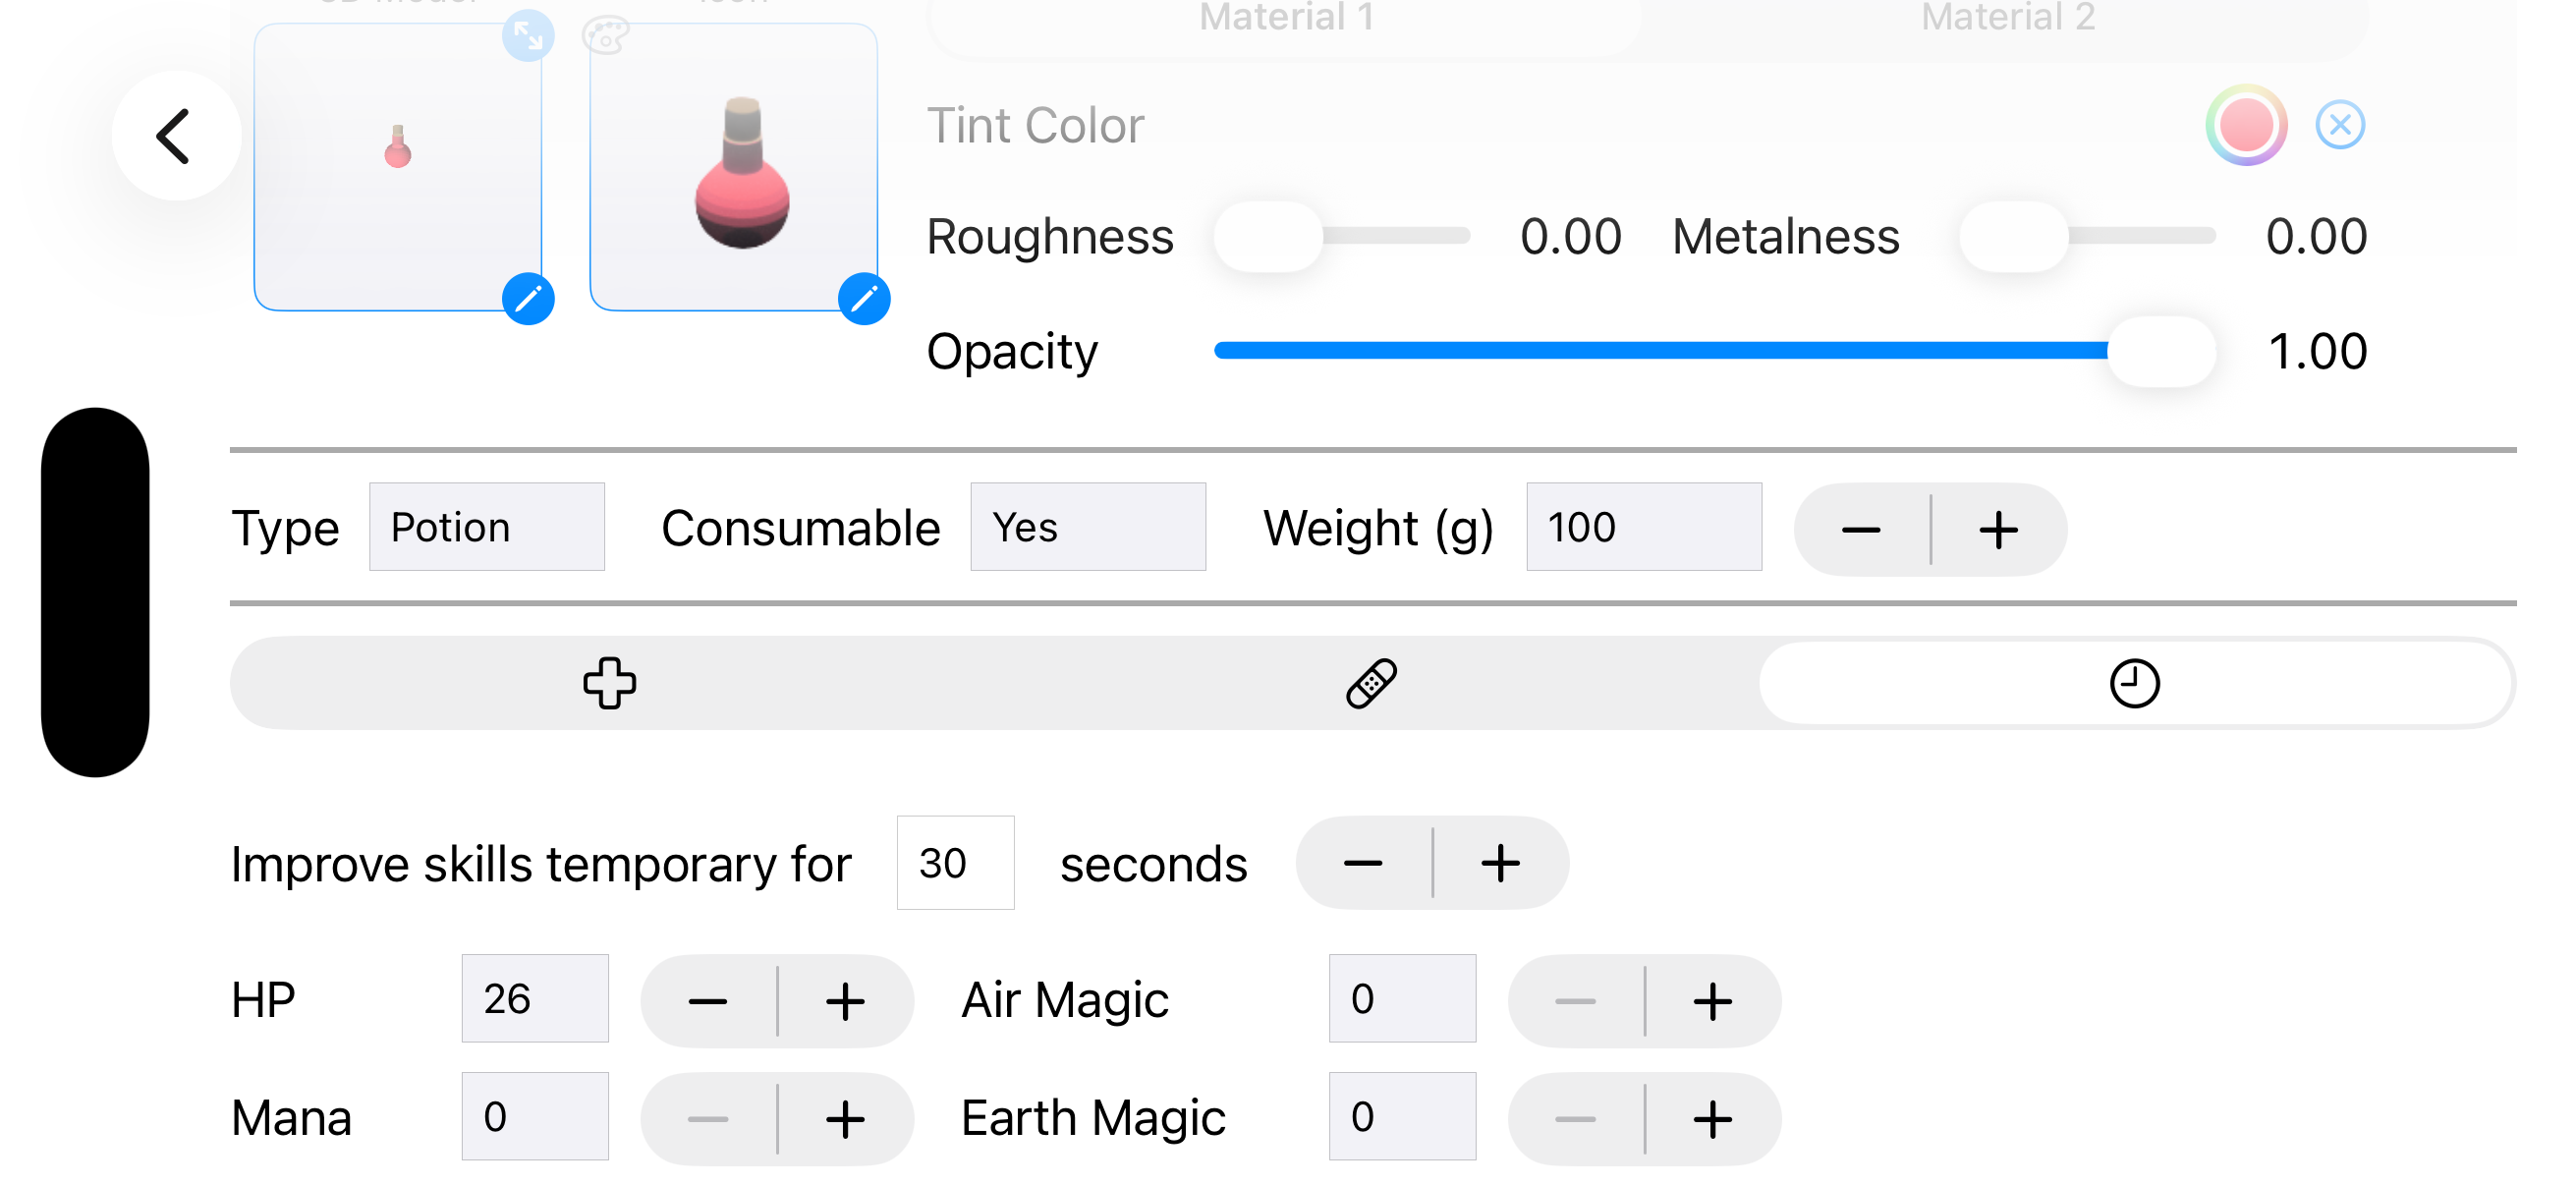
These provide time-limited enhancements:
- Strength buffs: Increased attack power for a duration
- Defense buffs: Reduced damage taken
- Speed buffs: Faster movement
- Skill potions: Special abilities and tactical advantages
Use Cases: Boss preparation, difficult combat sections, time-based challenges
Creating Custom Potions
- Select the potion 3D model
- Set the liquid material (slot 1) — tint color, and lower the opacity for a translucent look
- Set the glass / cap material (slot 2) — typically a brown or metallic tint
- Select potion type (Restore, Permanent, or Temporary)
- Configure the effect and duration (for temporary)
- Name the potion to reflect its effect
Custom Wearables
Wearables are armor and clothing pieces the player can equip for protection and stat bonuses.
Creating Custom Wearables
- Pick the wearable type (helmet, armor, boots, etc.)
- Choose the 3D model and customize its materials — raising metalness is handy for plate armor, while higher roughness suits leather or cloth
- Configure the bonuses the wearable grants: armor value, hitpoints, stamina, mana, attribute increases and elemental resistances
- Restrict the wearable to specific character classes (Fighter, Hunter, Priest, Mage) if needed
- Give it a descriptive name
Design Tips:
- Use light cloth wearables as early-game finds, heavier armor as late-game rewards
- Class-restricted gear encourages party diversity
- Combine an armor bonus with elemental resistances for boss-prep items
Using Items in Your Levels
Once you’ve created items, you need to place them in your levels. The process for adding items to specific tiles is covered in detail here: