HowTo: Design for depth
Creating a start screen with parallax animations using iOS motion effects:
One highly noticed innovation in iOS 7 was the parallax effect on the home screen. When you tilt your device this gives you the impression of depth. Luckily it is incredible easy to implement this behaviour with the iOS 7 motion effects.
First you need a background which is larger than the screen and some foreground elements like Buttons, Labels, …:
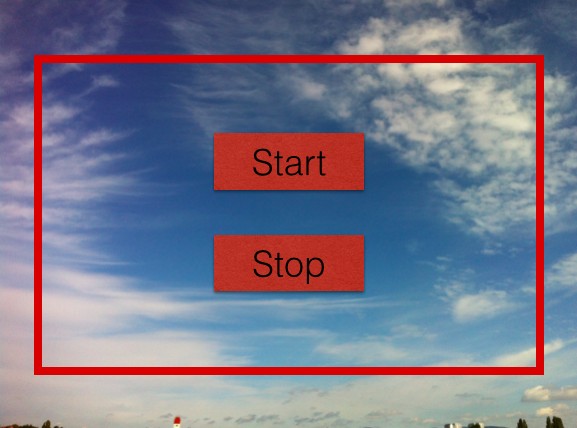
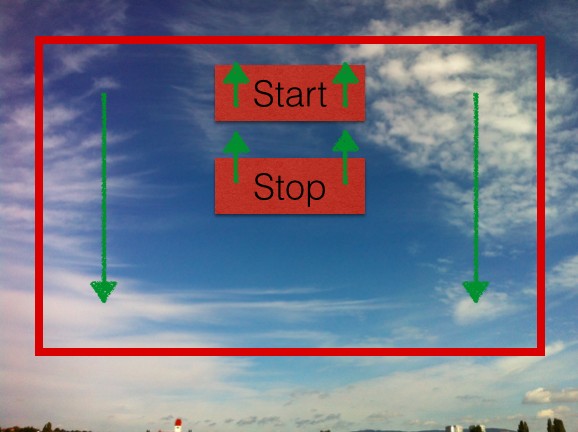
When the device is tilted, the background image must move in the opposite direction. In the example below down - the foreground elements have to move up. To enhance the impression of depth, it is also important that the movement of the background image is larger than the movement of the foreground elements like the buttons:
Now let’s code
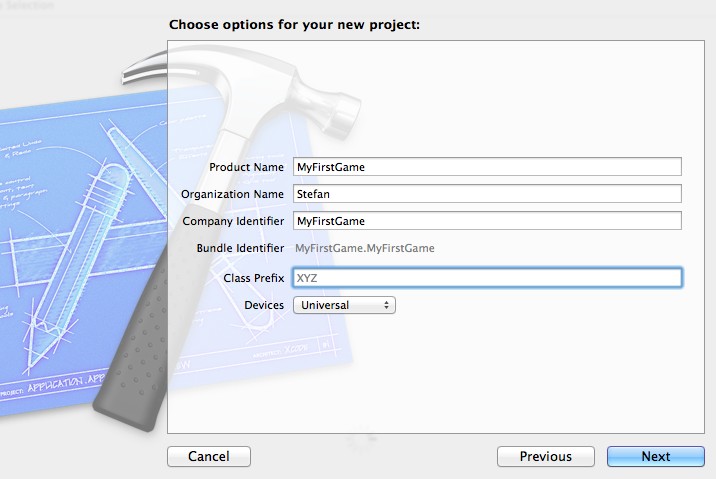
First of all create a new Single View Xcode project.
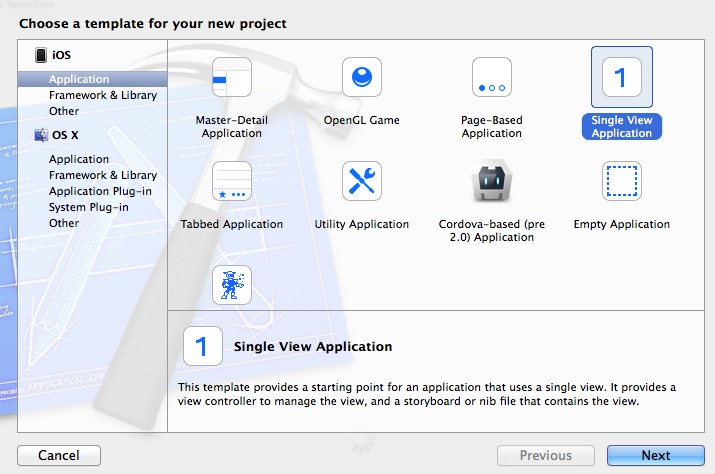
Choose Universal to target iPhone and iPad:
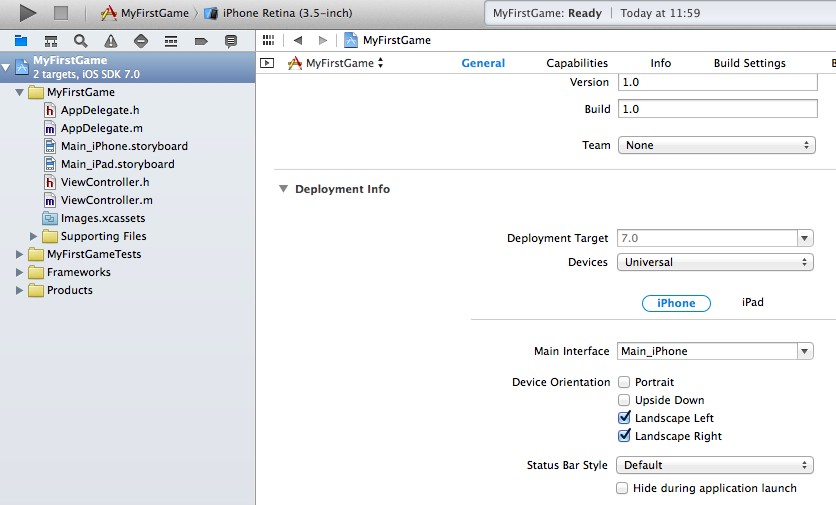
Limit supported orientations to landscape:
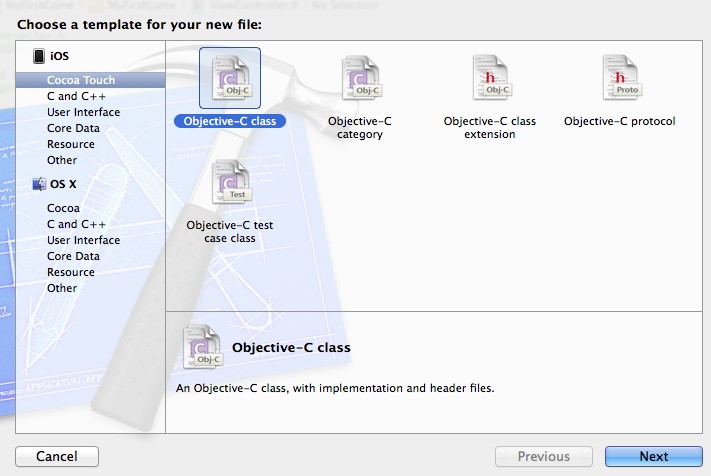
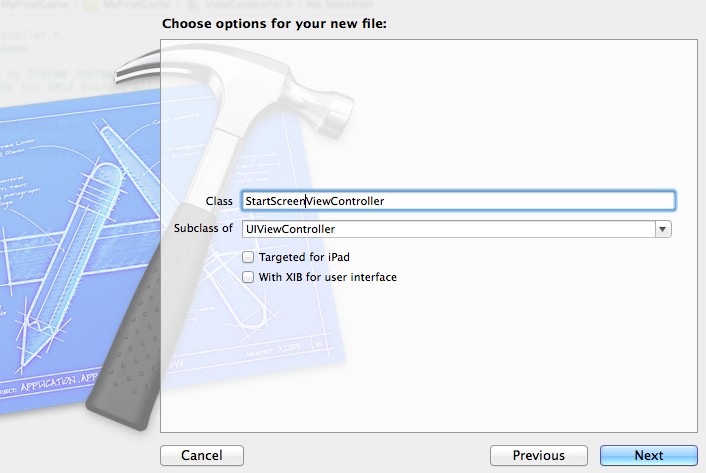
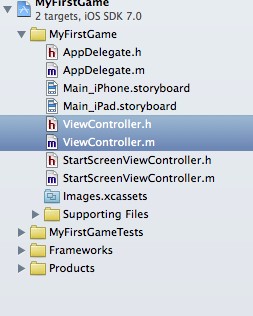
Create a new ViewController and name it StartScreenViewController.
After that delete the generic ViewController which was created automatically by XCode:
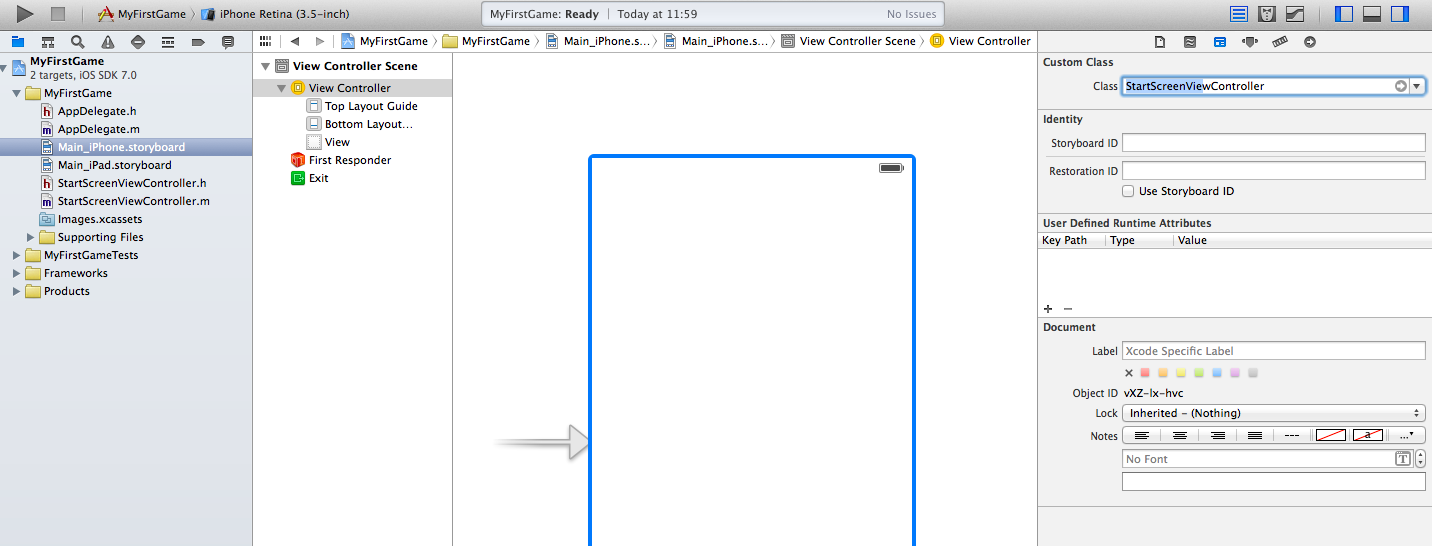
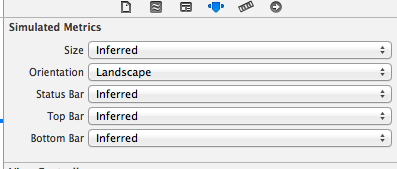
Open the iPhone Storyboard, change type of the ViewController to our new created StartScreenViewController and select landscape orientation:
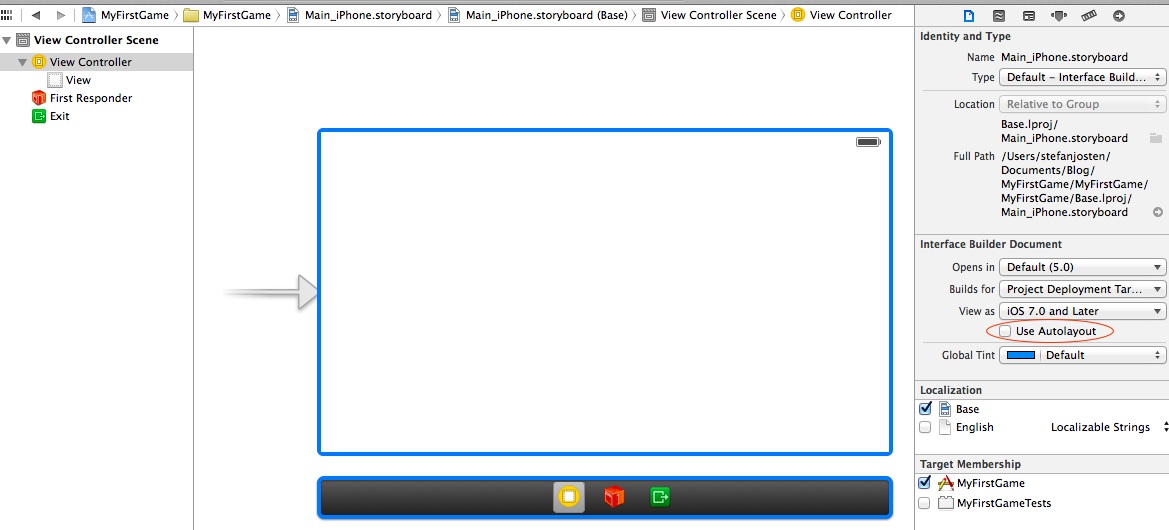
Because we are building a game, which runs only in landscape mode, we can switch off Auto Layout.
Now, let’s create the Start Screen. Add an UIImageView with a background image, a Label and 4 Buttons to the screen. I’ve chosen white as background color and an opacity of 0.9. After that, the screen should look like this:
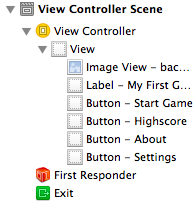
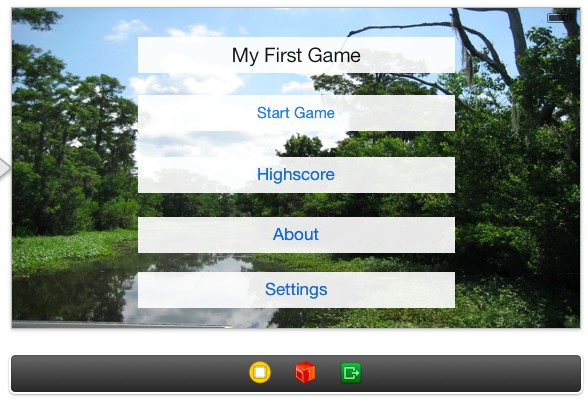

Now let’s create the corresponding outlets to get access to the UIElements from inside of our ViewController. (Use CTRL & Drag and the Split Screen View from XCode to connect the elements).
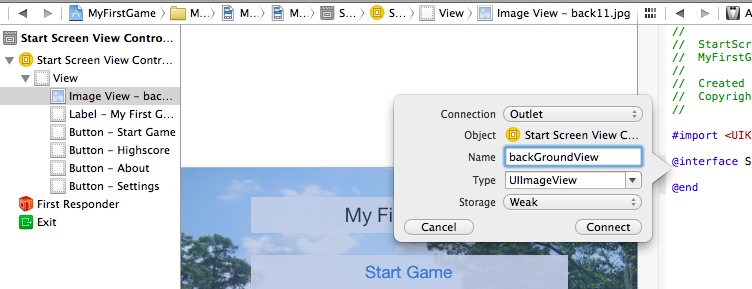
For the foreground elements choose an Outlet Collection of type UIView:
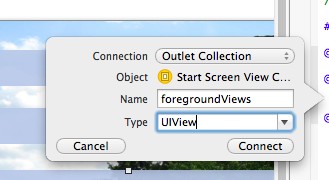

Now, everything is prepared to add the parallax effect. Therefore we’ll create two functions which will handle the device motion and the movement of our UI elements to the StartScreenViewController class:
-(void)assignBackgroundParallaxBehavior:(UIView*) view {
  CGRect frameRect = view.frame;

  // increase size of screen for 20%
  frameRect.size.width = view.frame.size.width * 1.2;
  frameRect.size.height = view.frame.size.height * 1.2;

  // Set origin to the center of the resized frame
  frameRect.origin.x=(view.frame.size.width-frameRect.size.width)/2;
  frameRect.origin.y=(view.frame.size.height-frameRect.size.height)/2;
  view.frame = frameRect;

  // Create horizontal motion effect
  UIInterpolatingMotionEffect *horizontalMotionEffect = [[UIInterpolatingMotionEffect alloc] initWithKeyPath:@"center.x" type:UIInterpolatingMotionEffectTypeTiltAlongHorizontalAxis];

  // Limit movement of the motion effect
  horizontalMotionEffect.minimumRelativeValue = @(frameRect.origin.x);
  horizontalMotionEffect.maximumRelativeValue = @(-frameRect.origin.x);

  // Assign horizontal motion effect to view
  [view addMotionEffect:horizontalMotionEffect];

  // Create vertical motion effect
  UIInterpolatingMotionEffect *verticalMotionEffect = [[UIInterpolatingMotionEffect alloc] initWithKeyPath:@"center.y" type:UIInterpolatingMotionEffectTypeTiltAlongVerticalAxis];

  // Limit movement of the motion effect
  verticalMotionEffect.minimumRelativeValue = @(frameRect.origin.y);
  verticalMotionEffect.maximumRelativeValue = @(-frameRect.origin.y);

  // Assign vertical motion effect to view
  [view addMotionEffect:verticalMotionEffect];
}

-(void)assignForegroundParallaxBehavior:(NSArray*) view {
  int iMotionEffectSteps=20;

  // Create horizontal motion effect
  UIInterpolatingMotionEffect *horizontalMotionEffect = [[UIInterpolatingMotionEffect alloc] initWithKeyPath:@"center.x" type:UIInterpolatingMotionEffectTypeTiltAlongHorizontalAxis];
  horizontalMotionEffect.minimumRelativeValue = @(iMotionEffectSteps);
  horizontalMotionEffect.maximumRelativeValue = @(-iMotionEffectSteps);

  // Create vertical motion effect
  UIInterpolatingMotionEffect *verticalMotionEffect = [[UIInterpolatingMotionEffect alloc] initWithKeyPath:@"center.y" type:UIInterpolatingMotionEffectTypeTiltAlongVerticalAxis];
  verticalMotionEffect.minimumRelativeValue = @(iMotionEffectSteps);
  verticalMotionEffect.maximumRelativeValue = @(-iMotionEffectSteps);

  // Assign motion effects to every view of the outlet collection
  for (int i=0; i<view.count; i++) {
    [view[i] addMotionEffect:horizontalMotionEffect];
    [view[i] addMotionEffect:verticalMotionEffect];
  }
}
Call these methods at the end off the viewDidLoad function:
-(void)viewDidLoad {
  [super viewDidLoad];

  // Do any additional setup after loading the view.
  [self assignBackgroundParallaxBehavior:self.backgroundView];
  [self assignForegroundParallaxBehavior:self.foregroundViews];
}
Test it on a device
…. Nice!
Do the same for iPad
That’s all for today.
Cheers,
Stefan
